

Go to ‘Calendar’
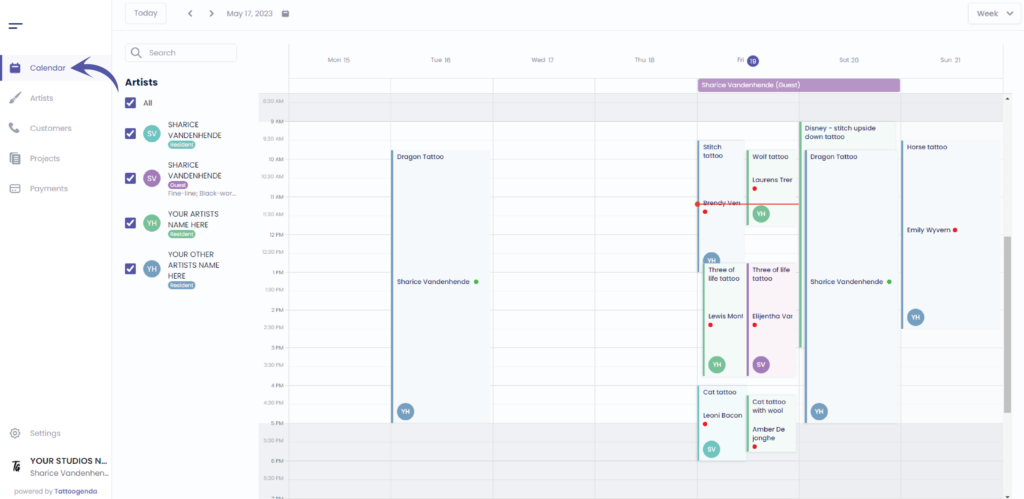
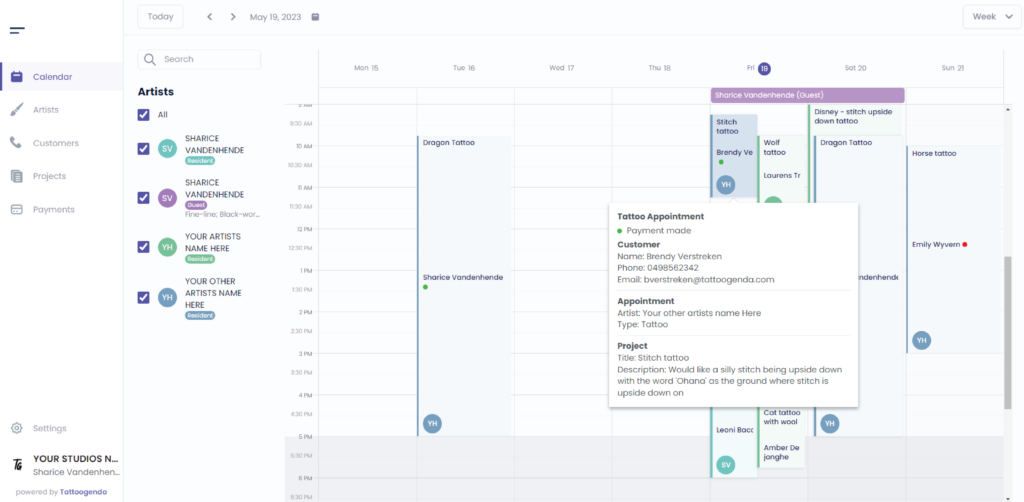
You will see the following screen
We will select this appointment in this tutorial

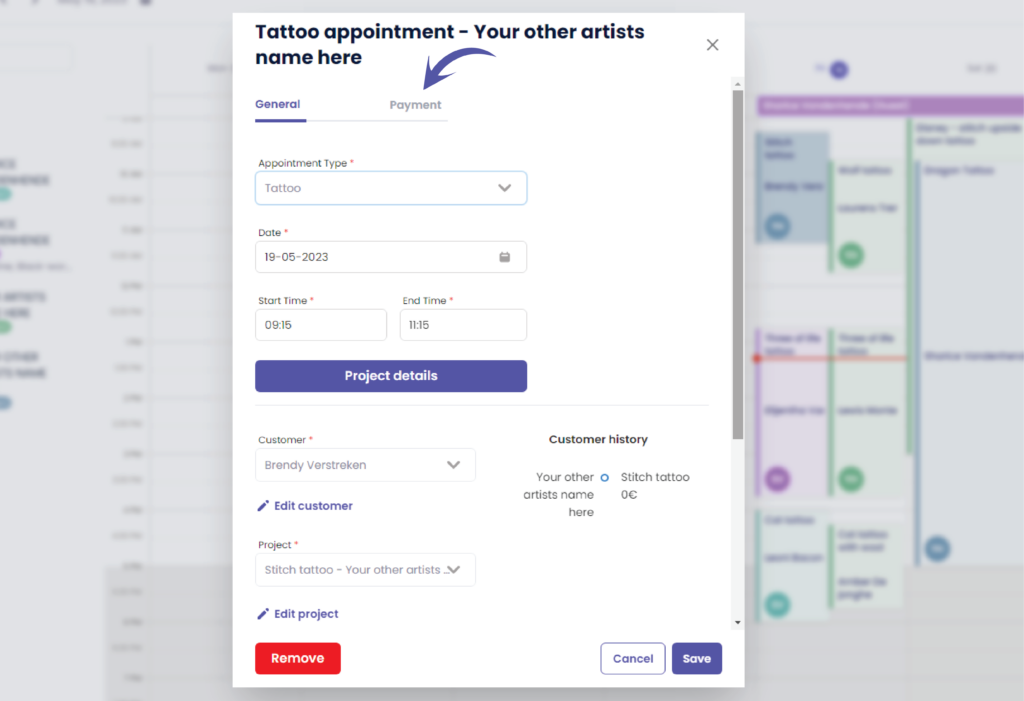
You will see the following popup screen
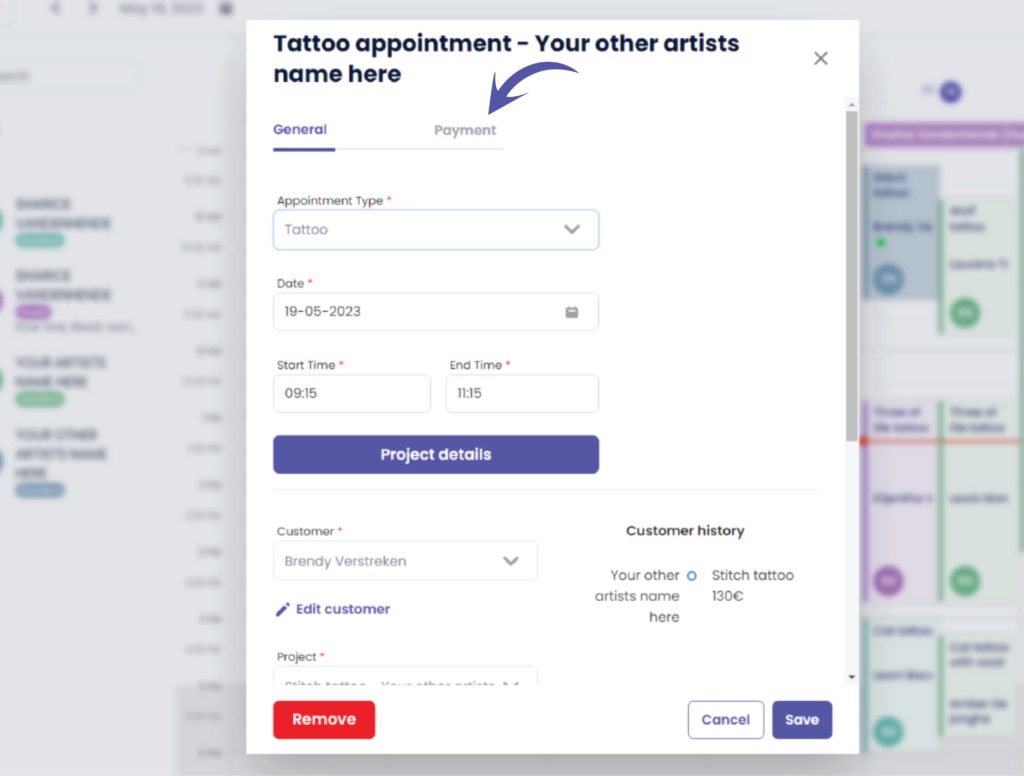
Go to ‘Payments’
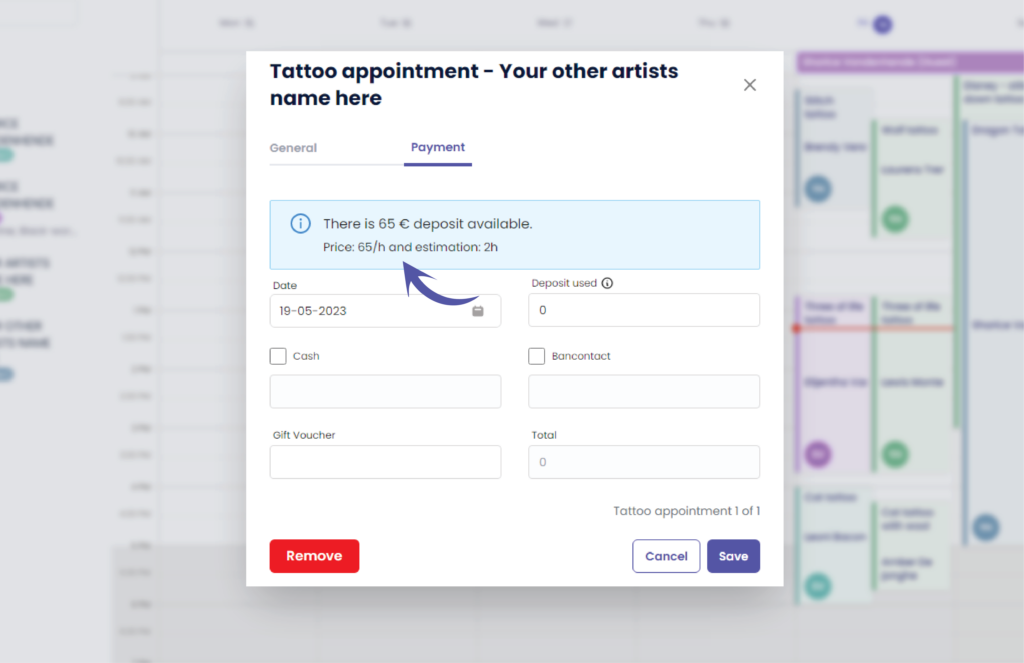
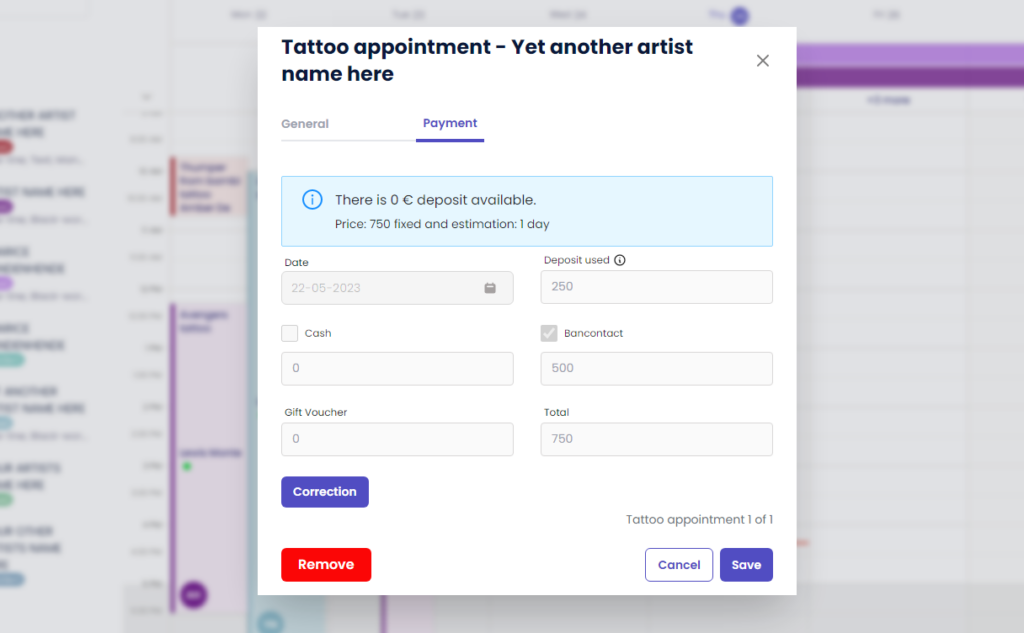
Here you can check if u still have a deposit available
( e.g. Available deposit €65 )
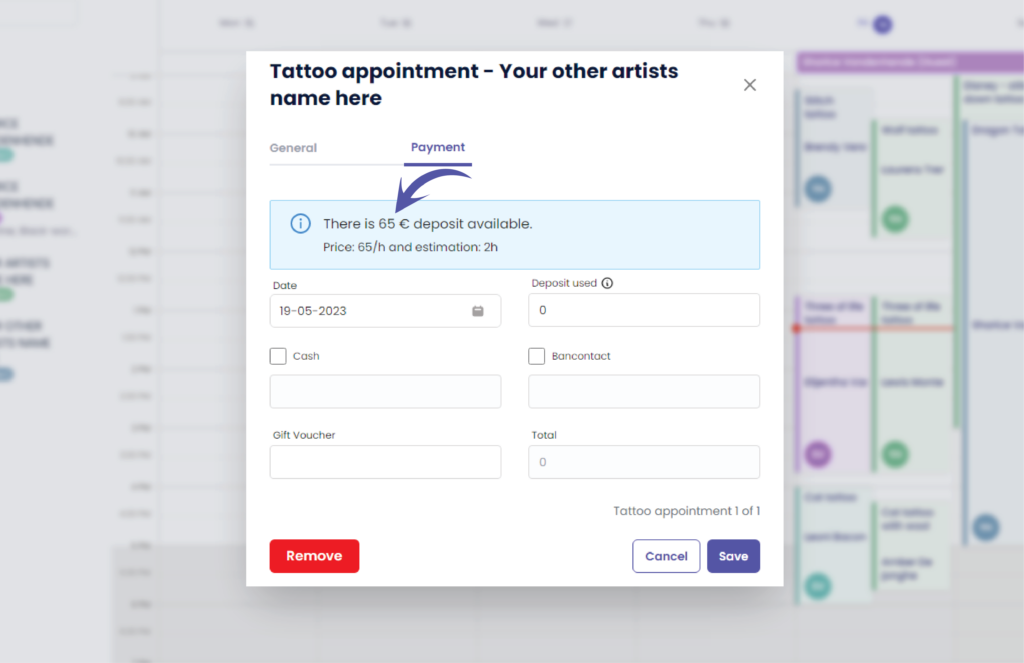
Here you can see the price and estimation details that was agreed to your customer
( e.g. Price was €65 / h – Estimated time was 2h )
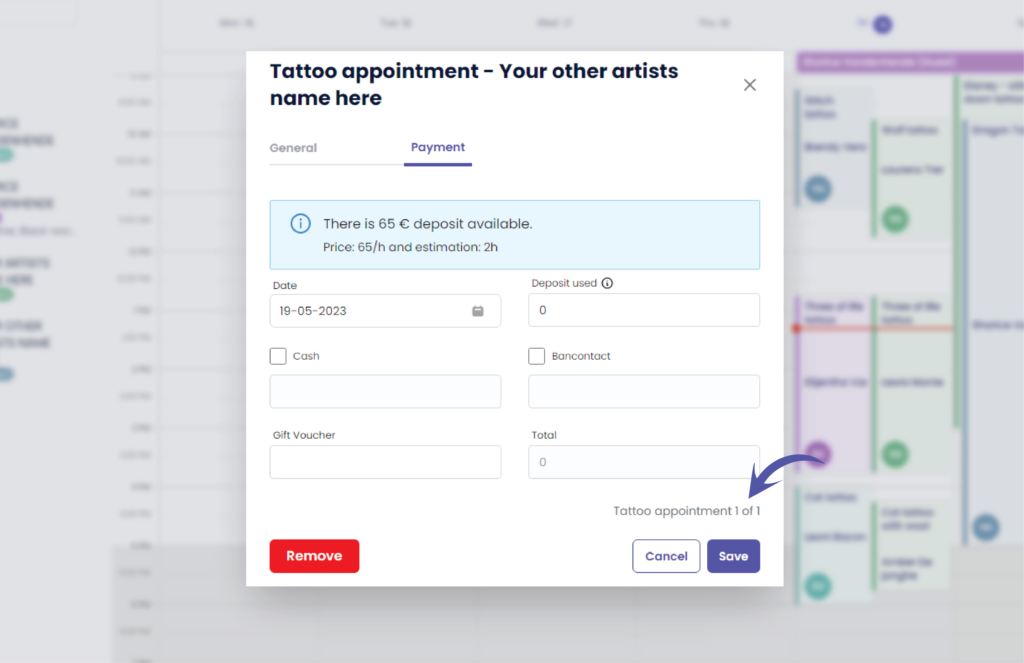
Here you can see the current appointment and how many appointments there are for this project
( e.g. 1 of 1 )
This helps you decide if you should use the deposit already or not. Mostly you use the deposit only on the last appointment.
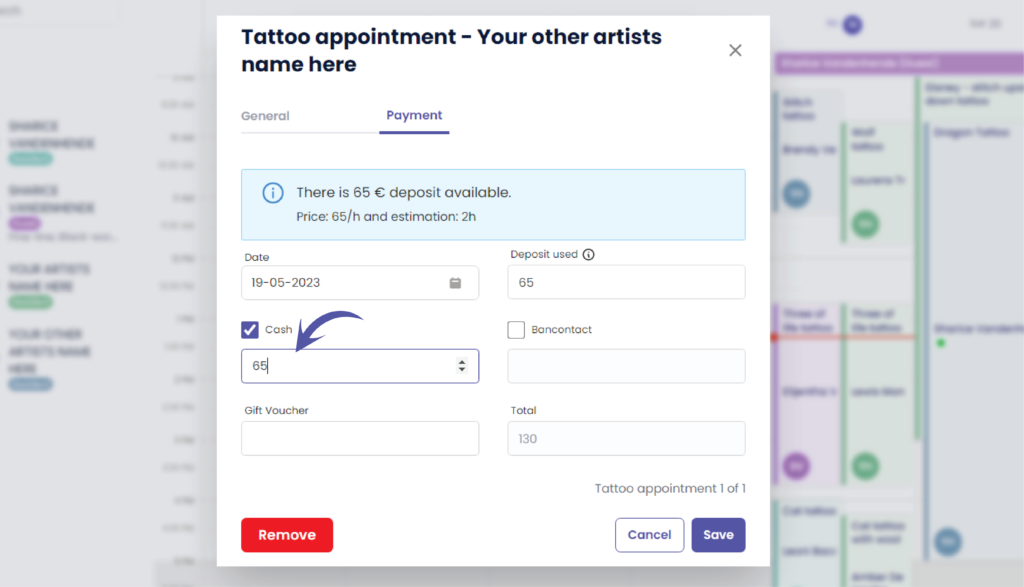
Here you fill out the amount of deposit you wish to use in this payment
( e.g. €65 )

If your customer would pay in cash you can check the checkbox and fill out the amount
( e.g. €65 )
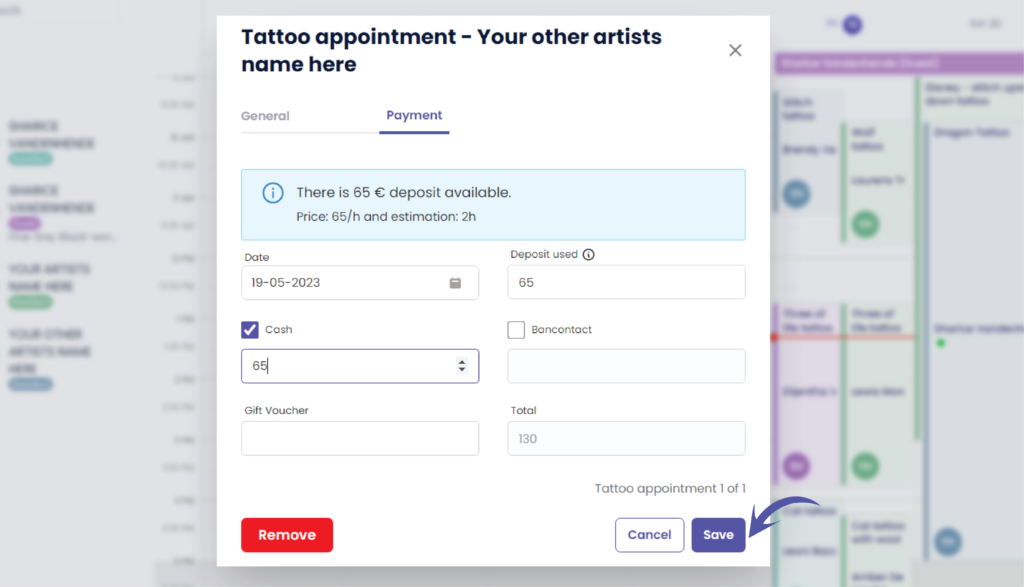
Click ‘Save’ to register your payment for this appointment
You will be brought back to the calendar
Take a closer look to this paid appointment
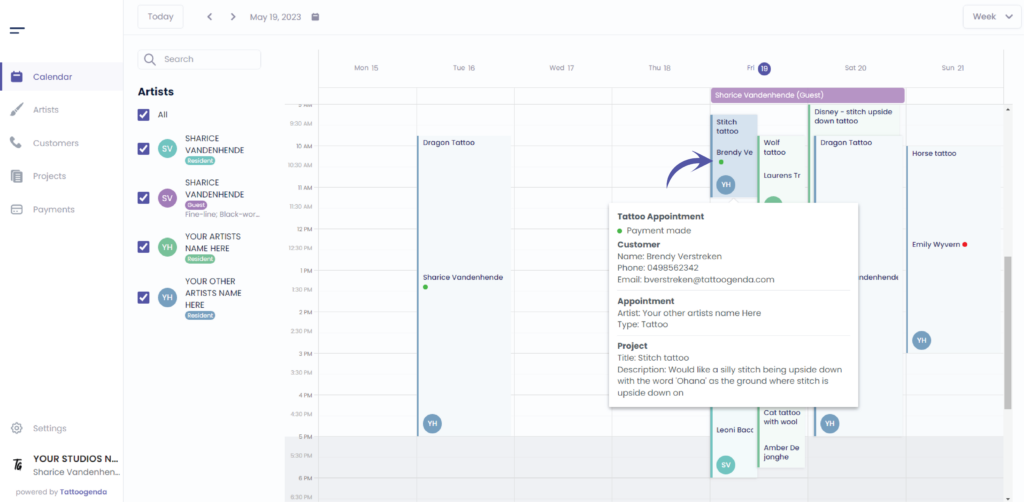
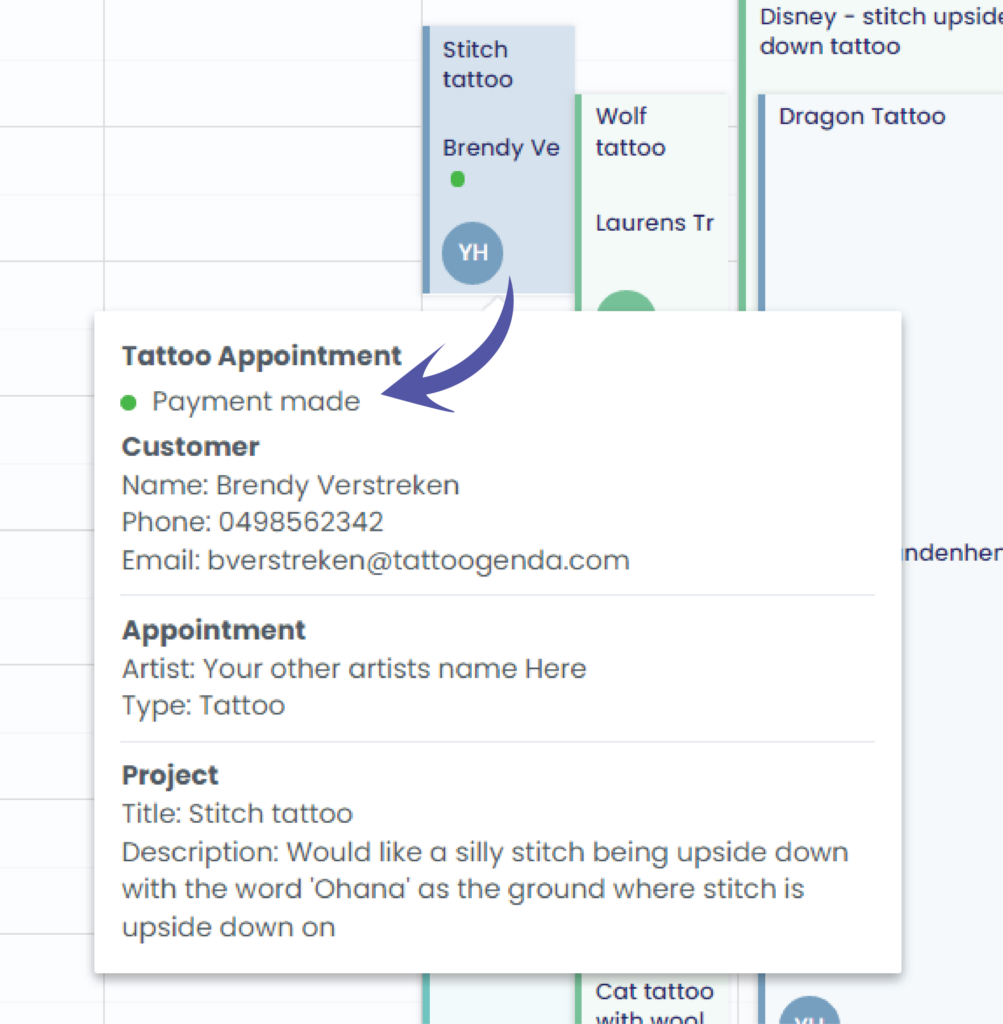
You will notice a green dot
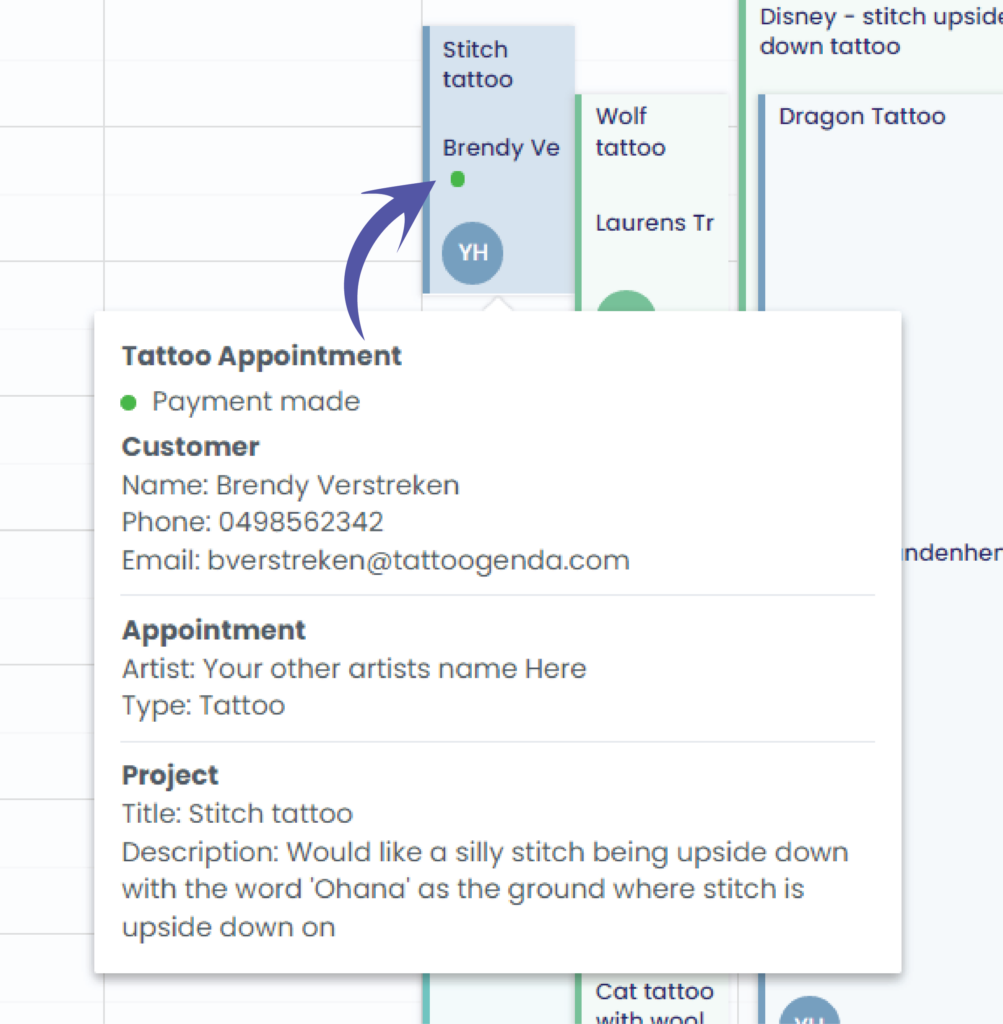
The green dot means a payment was made for this appointment
Click back on your appointment to get to the following screen
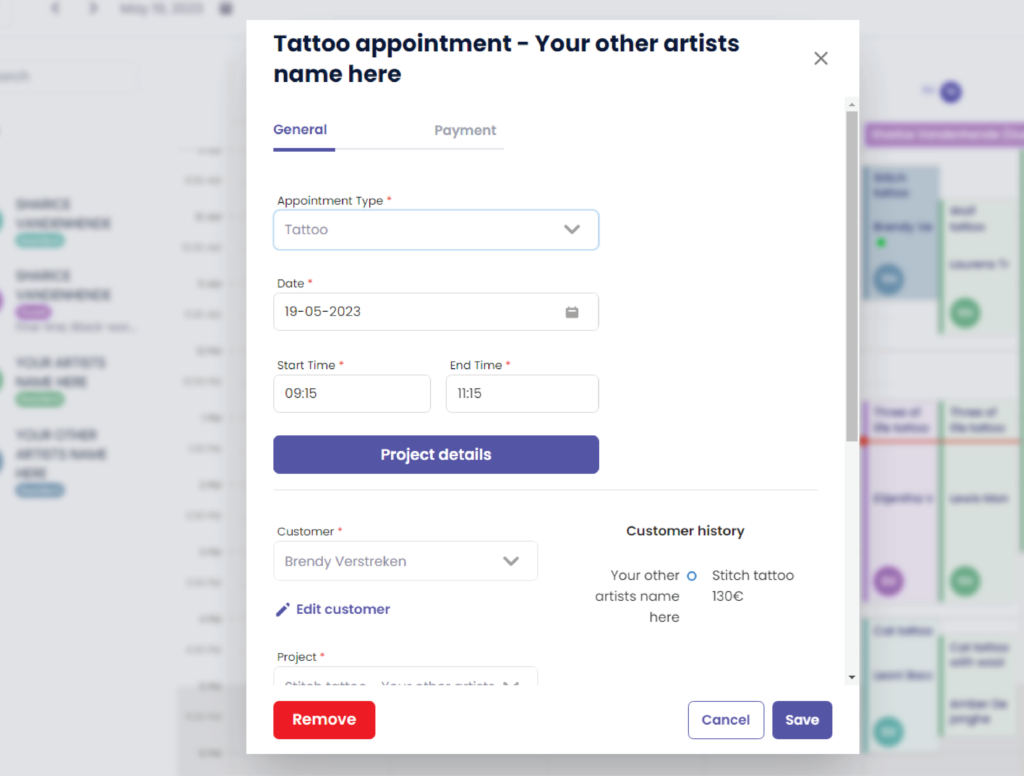
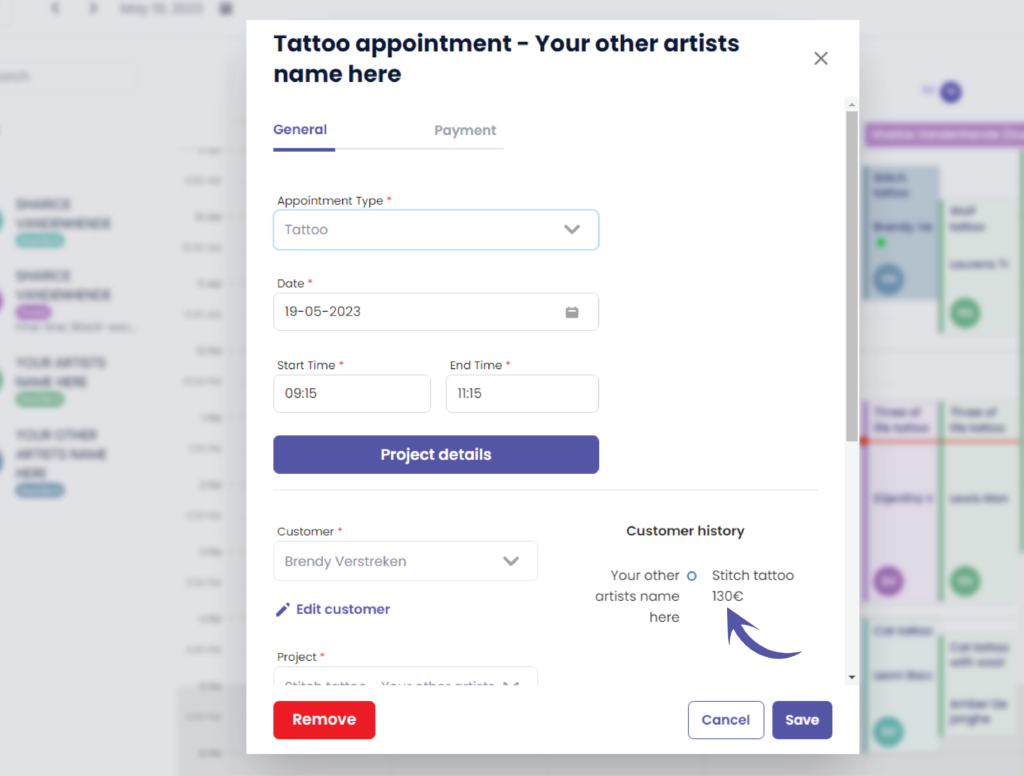
You can see that the payment into your customers history
link here More information about customer history here link here
Go to payment
Notice that everything is grayed out, the correction button will only be visible for
The main account & for receptionists with full access.
Full access means that the receptionist is able to edit payments.
Check out the following article on how to add a receptionist with full or no full access.
This is to avoid that corrections can be made by artists or by receptionists without ‘edit payment’ access.
You still have a problem or a question?
You can find a little link below called ‘Still stuck? How can we help!’
Written by
Sharice Vandenhende
By Tattoogenda


