

There’s two ways to create a project
Through an appointment
OR
Through projects
CREATE A PROJECT WHILE MAKING AN APPOINTMENT #
Go to ‘Calendar’
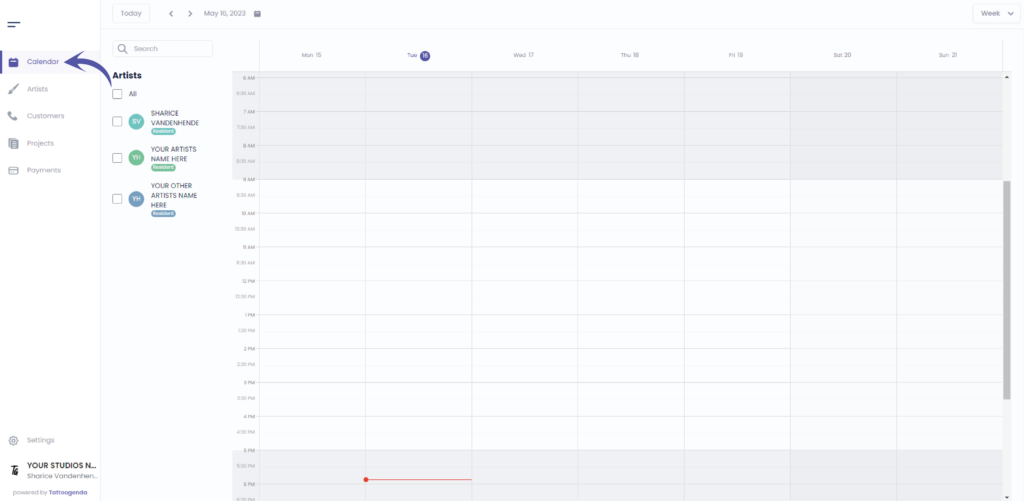
Click on the calendar or select a timeframe on the date you want to make an appointment.
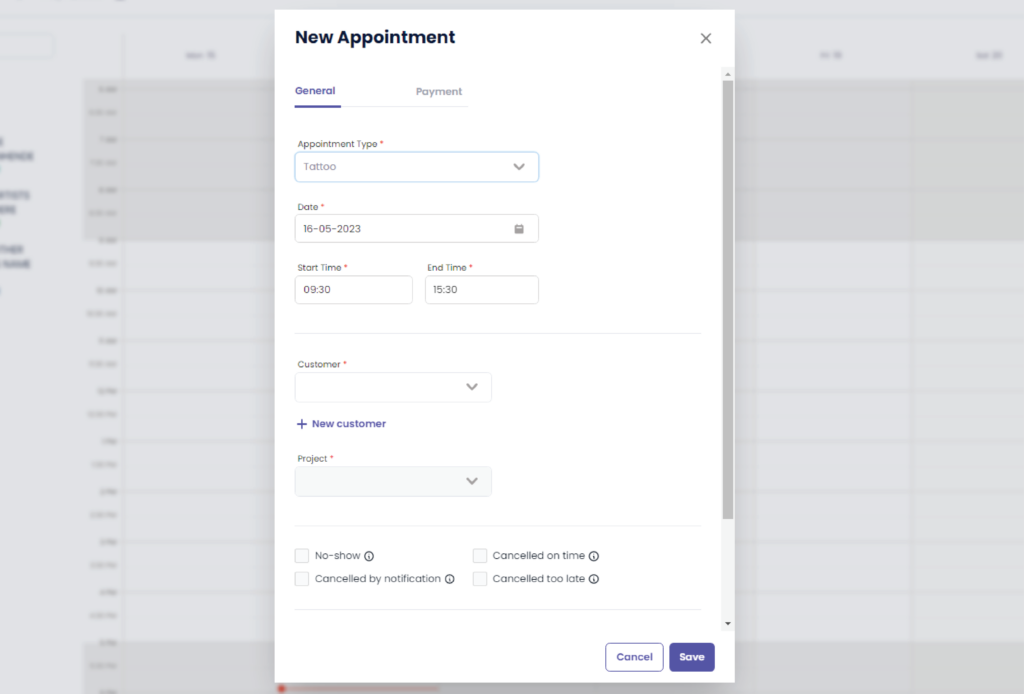
This will open up a screen called ‘New Appointment‘
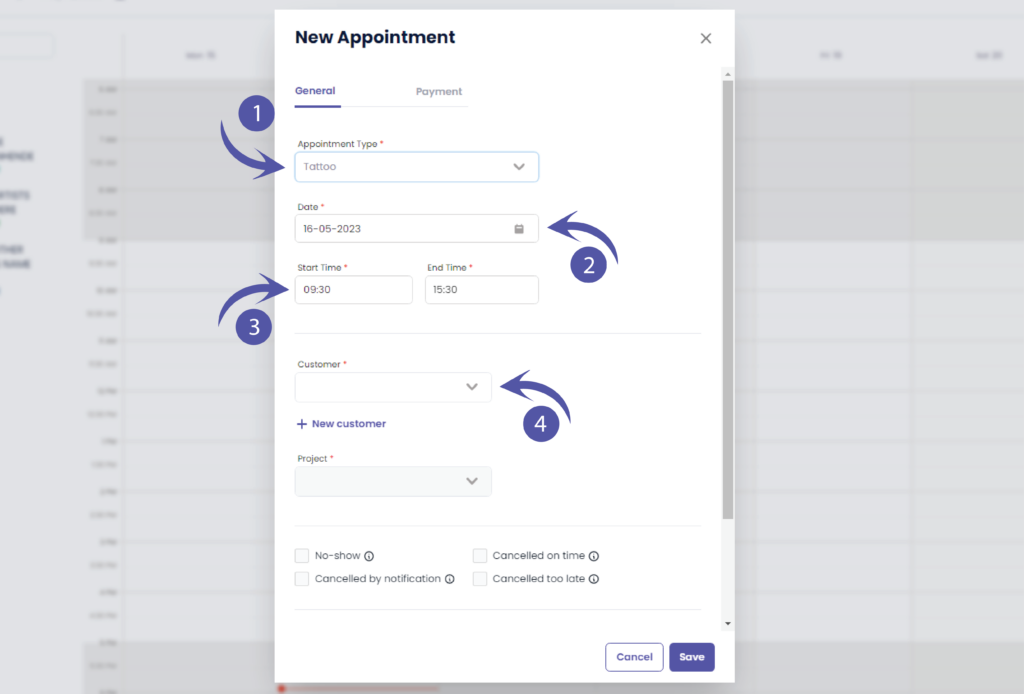
( 1 ) Appointment type will be automatically selected as a ‘Tattoo’
( 2 ) The date will be automatically set to the date you clicked on your calendar ( e.g. 16th Of May )
( 3 ) Start time and end time will be automatically set to the time you selected ( e.g. 9:30 AM – 3:30PM )
( 4 ) Select your customer for this appointment. Without selecting a customer you cannot add a new project
Click on ‘New project’

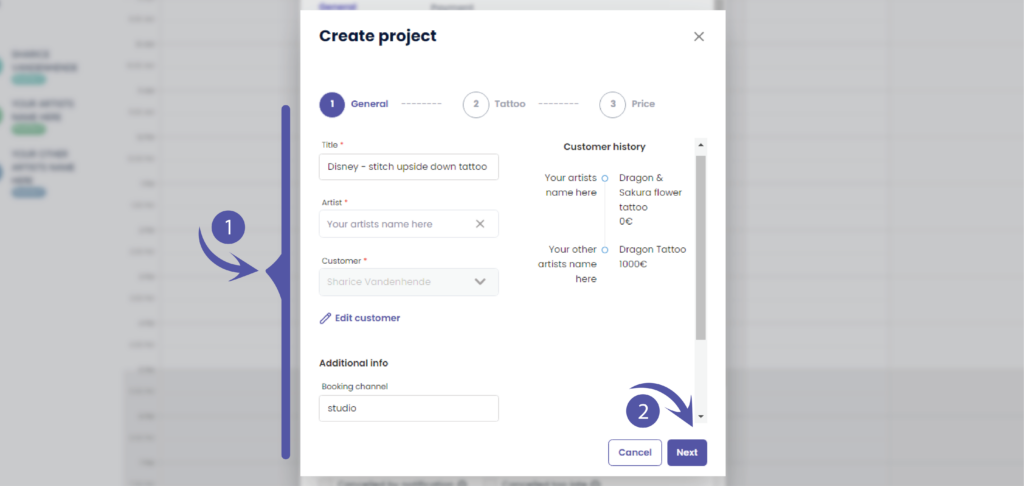
A new popup screen will appear called ‘Create project’
As you can see we have 3 steps to complete
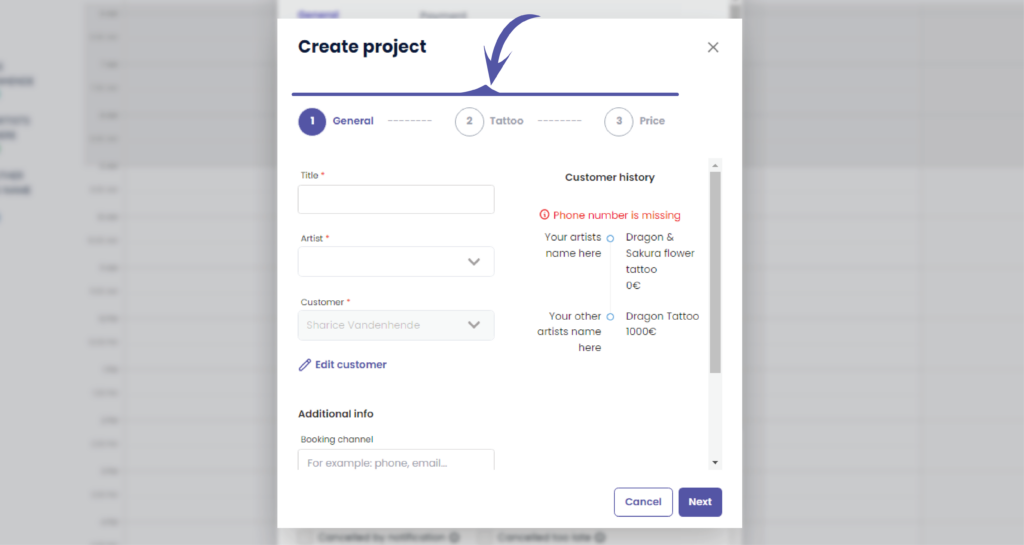
Title
this is how you’d like to call this project
( e.g. Disney – stitch upside down tattoo )
Artist
select the artist that will be working on this project
(e.g. Dave Matthews )
Customer
this should be grayed out as you already assigned a customer to the appointment.
( e.g. In this tutorial we had assigned Sharice as a customer )
Additional info
here you can enter what booking channel was used.
This could be: ‘ email, phone, online, studio, convention,..
( e.g. we used studio as this project was booked into the studio ) .
This field is only available for ‘Bigger Studio’ and ‘Expert Studio’ subscriptions.
Click ‘Next’
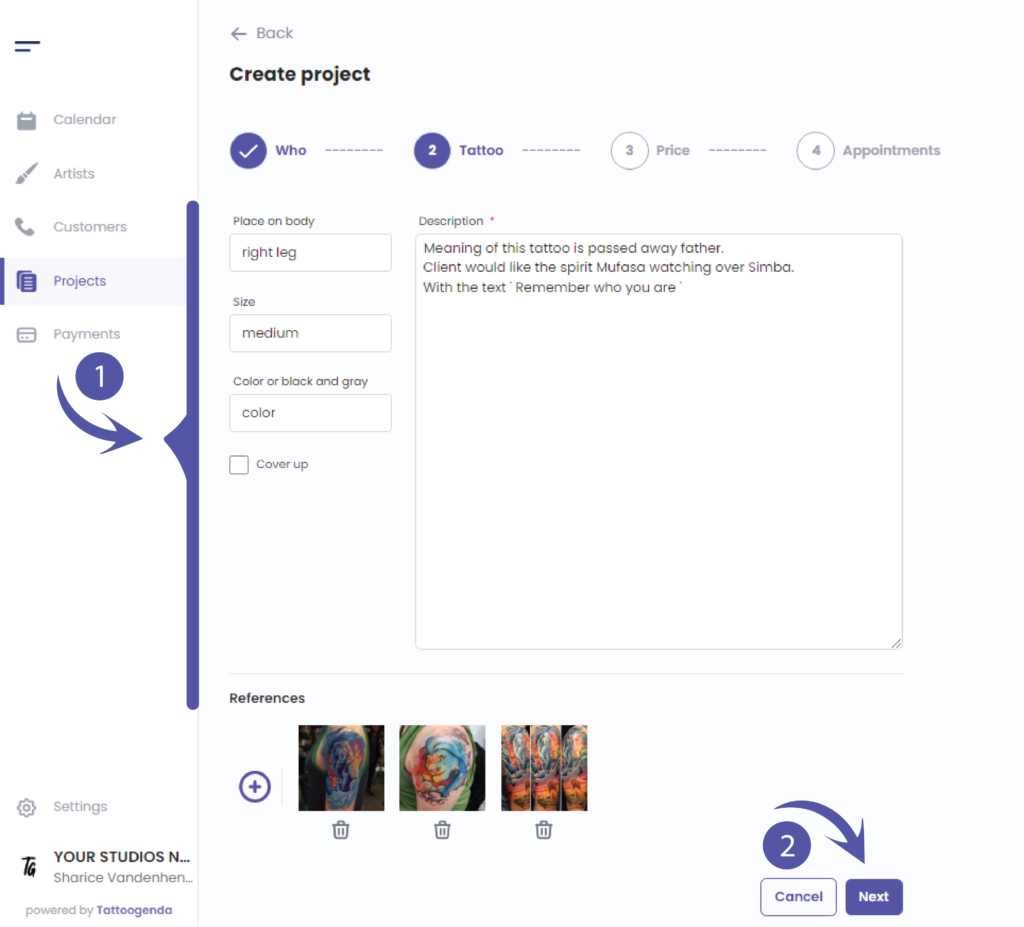
Tattoo description #
We progressed to step two called ‘Tattoo’
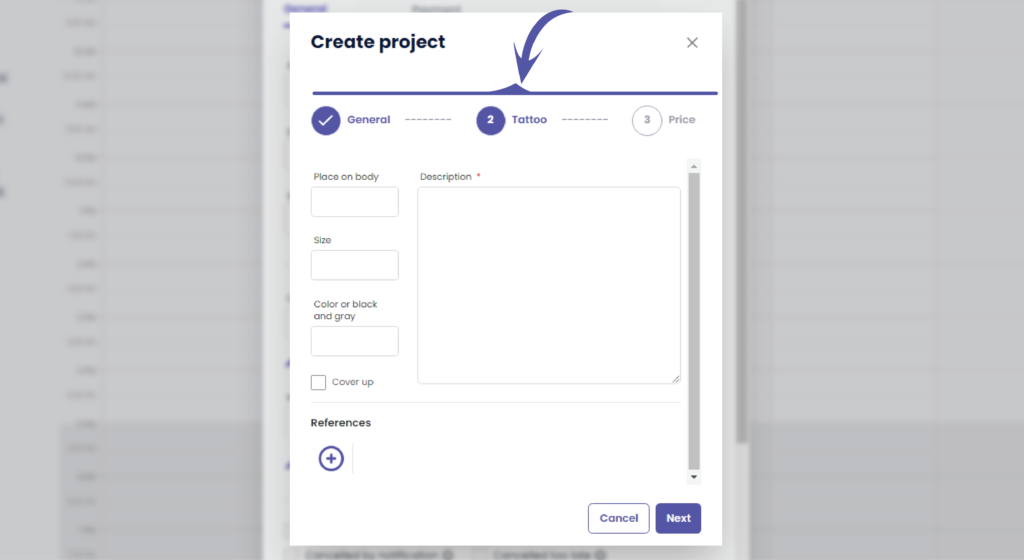
Place on body
This field will hold the placement details
( e.g. Right lower arm )
Size
This field holds the approximate size of the tattoo
( e.g. medium )
Color or black and gray
This field will hold color information
( e.g. color )
Description
This field holds any information you’d like to be remembered of
This could be a description about the tattoo, the tattoo meaning, colors a client would like to see in a tattoo and more
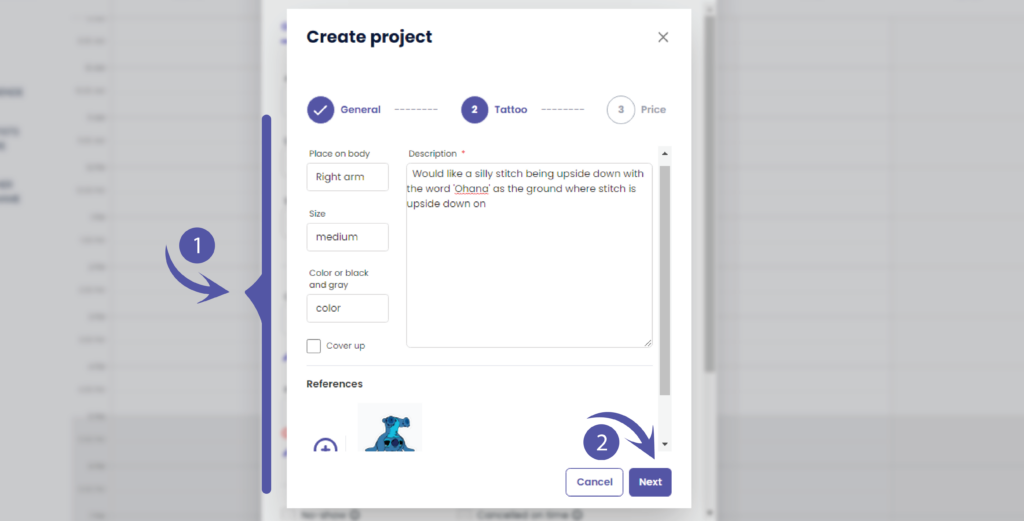
( e.g. we entered a little bit of information about the tattoo )
If you take bookings through social media, or email, you can just copy paste your conversation here.
References
Here you can upload the examples your customer sent.
( e.g. we added a picture of an upside down stitch the client liked )
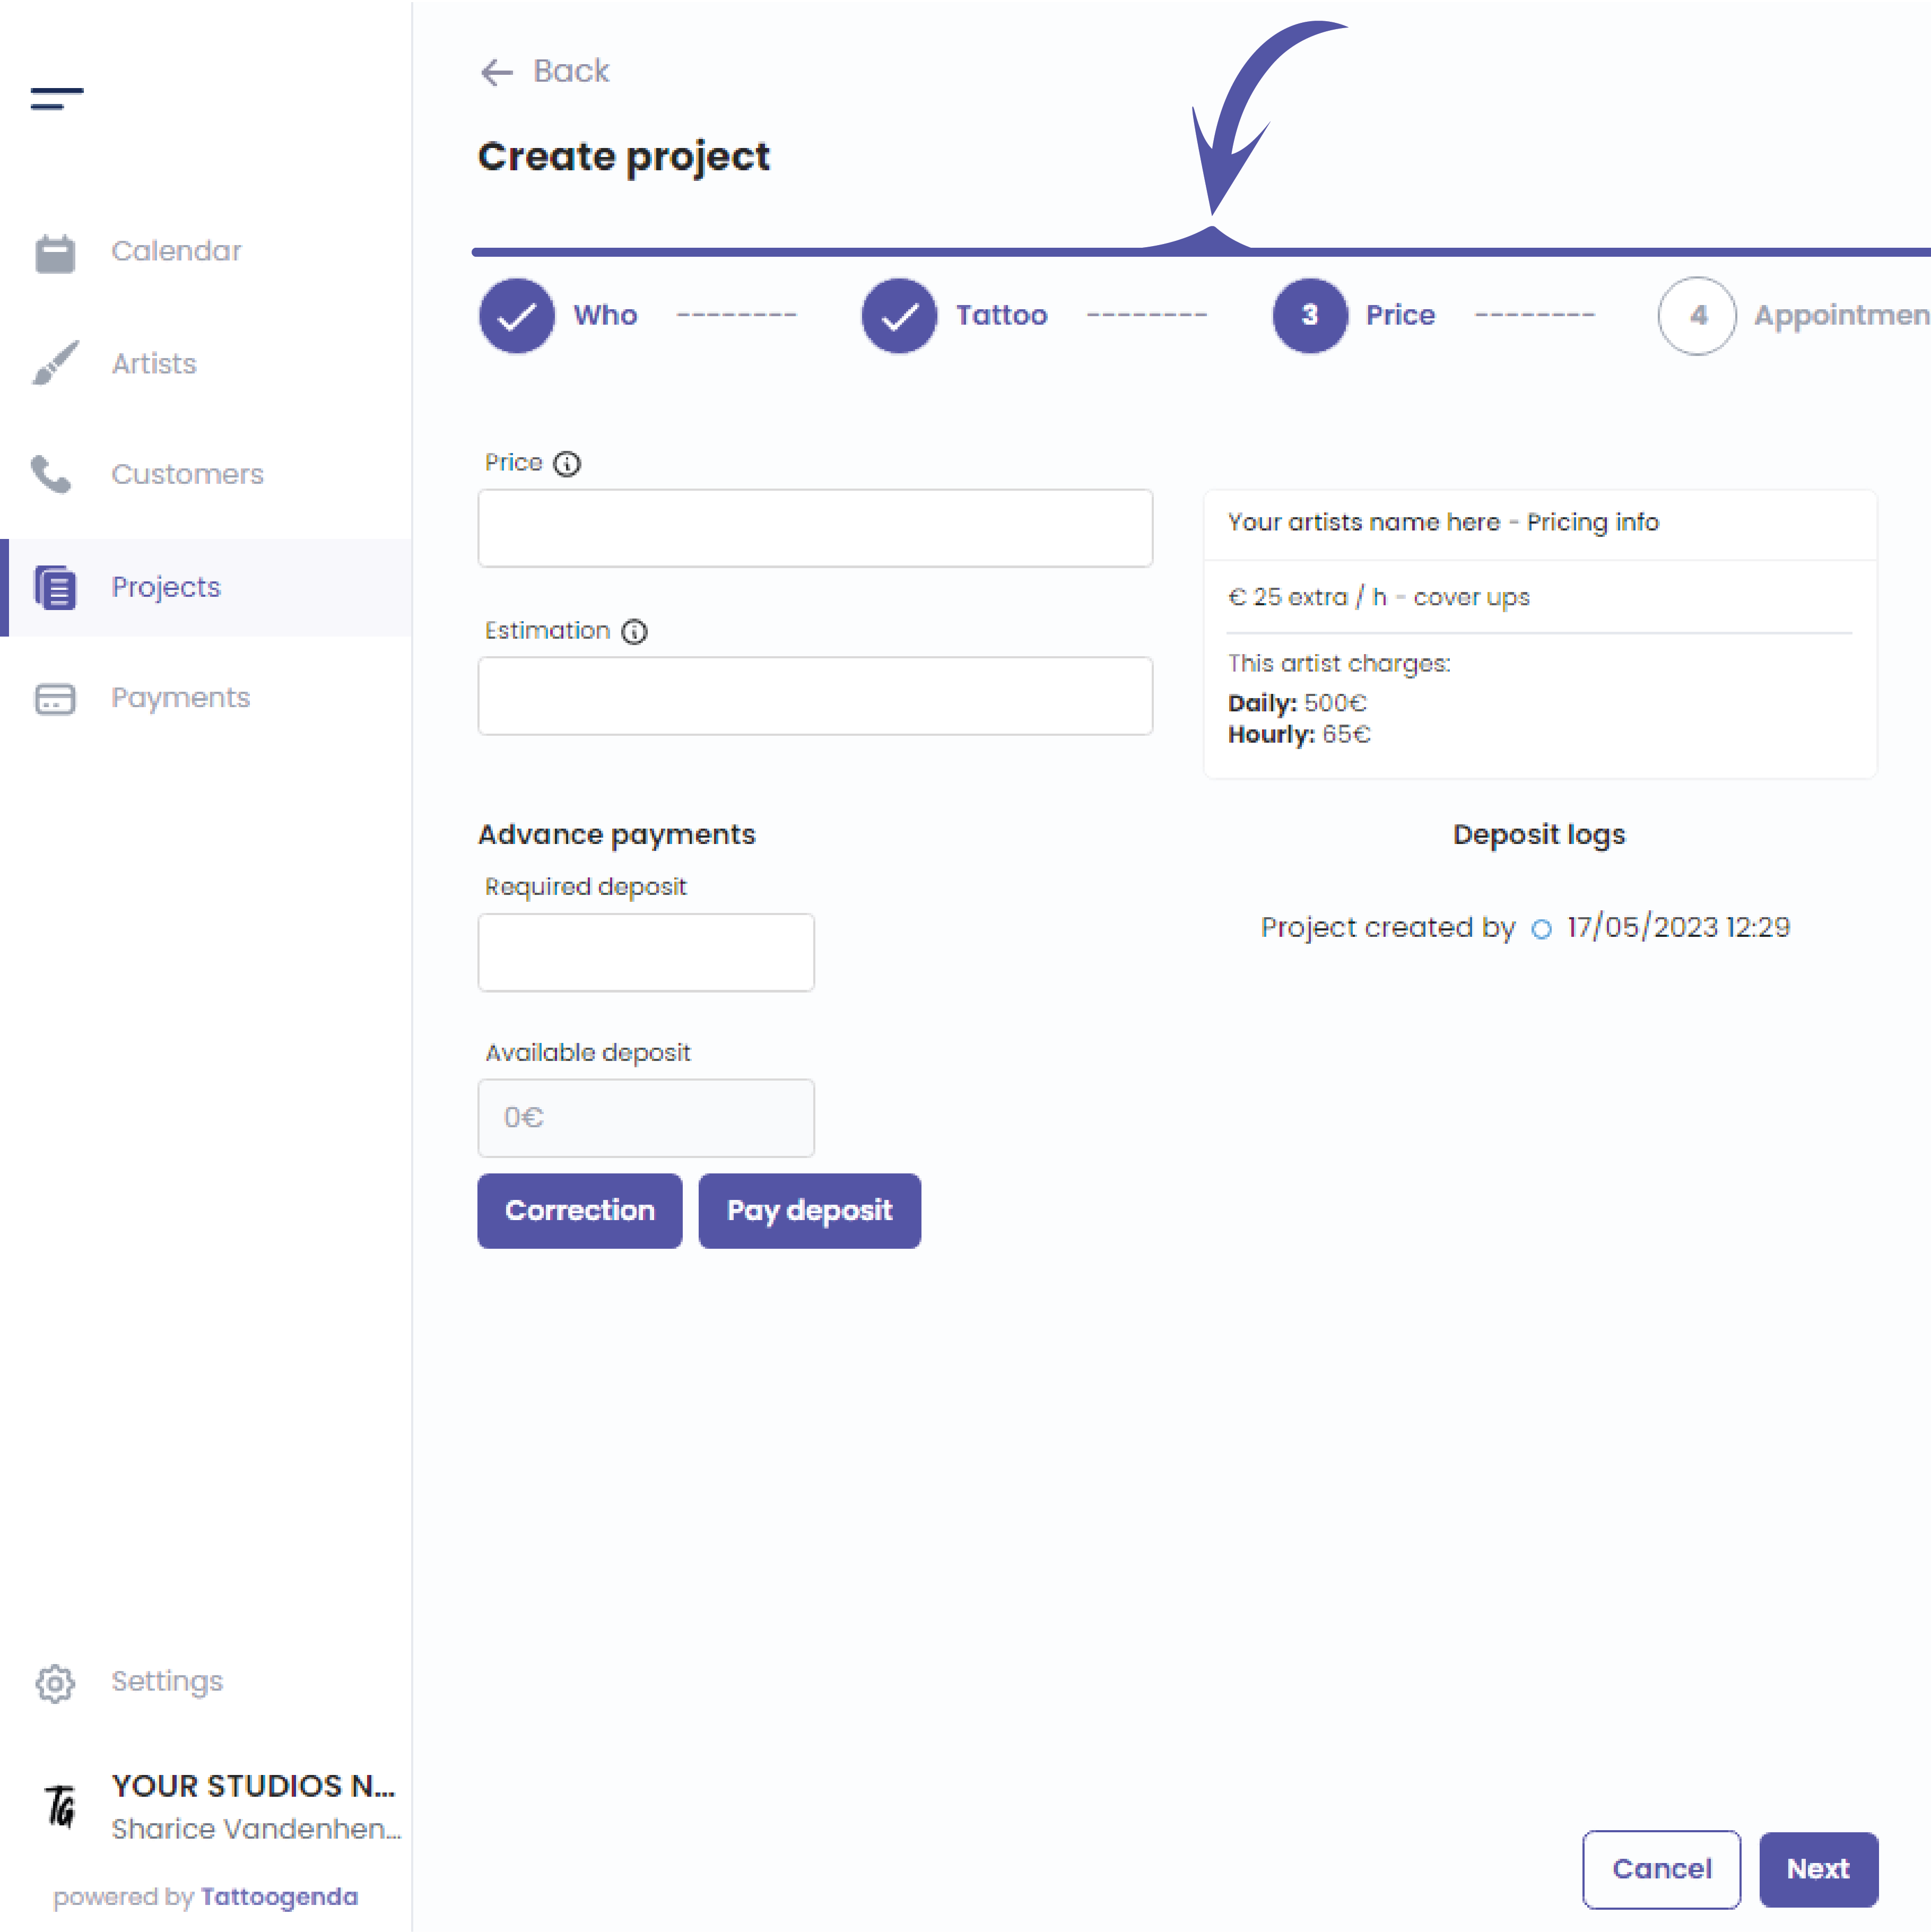
Tattoo price #
If You have a ‘Single Artist‘ or a ‘Small Studio‘ subscription, you are now finished.
If you have a ‘Bigger Studio‘ or ‘Expert Studio‘ subscription you now have step 3, called ‘Price’.
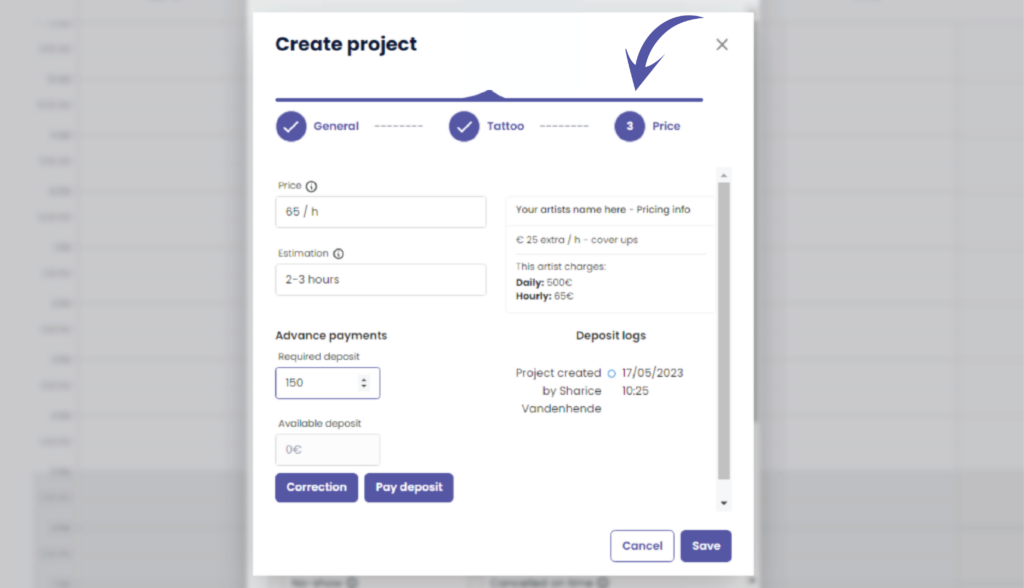
You can see a summary of the artists financial pricing information.
This box is just ment as a reminder to the person creating the booking.
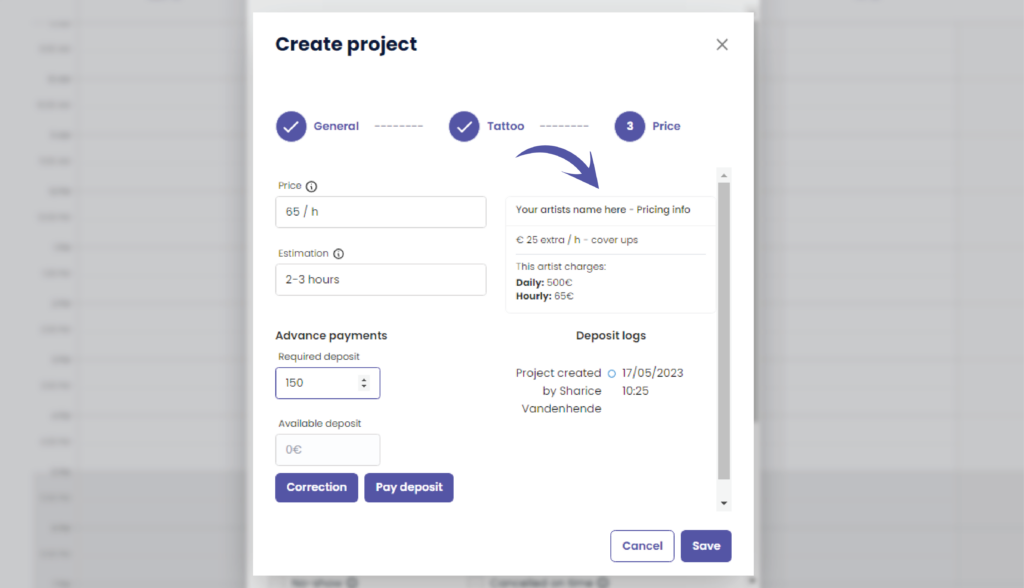
Price
This can hold any information you’d like to display when a payment for this project is made.
( e.g. €65 / hour, or 350€ )
Estimation
Here you can enter your estimated time this project will take.
( e.g. 2-3 hours )
Why Keep track of your estimation? #
Let’s say you estimated 5 hours to your customer. And you are finished in 7 hours instead. Then you know to maybe charge a little less than 7 hours. Or vice versa, if you worked 5 hours but you estimated 10, now you can think if you want to charge a bit less or not.
Required deposit the required deposit is the amount the customer will need to pay to confirm their appointment.
This can be prefilled for you if the artist has set their default amount.
( e.g. €150 )
Available deposit the available deposit is the amount the customer has already payed in advance and has not yet been used.
( e.g. €0 because the deposit payment has not yet occurred )
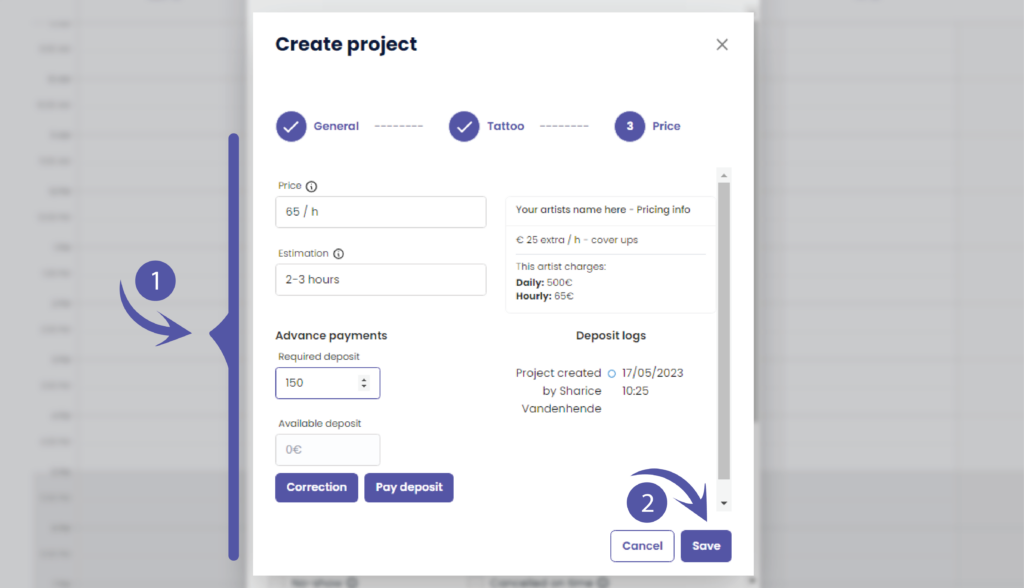
Click on the articles below for more information about how to pay a deposit or how to set a default deposit amount per artist
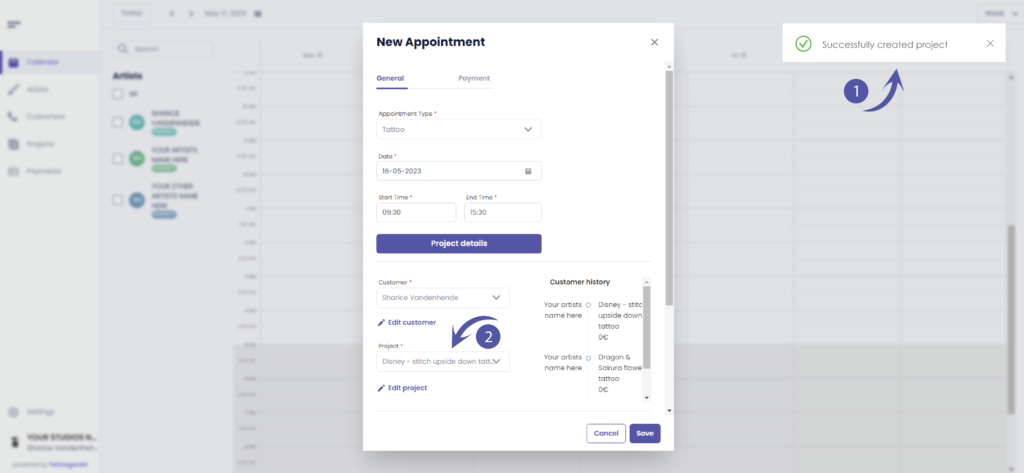
( 1 ) You will see a little notification at the right side that you’ve successfully created this project
( 2 ) You will now see that your project has automatically been selected into this appointment
Save this appointment by clicking save

CREATING A PROJECT THROUGH PROJECTS #
Go to ‘Projects’
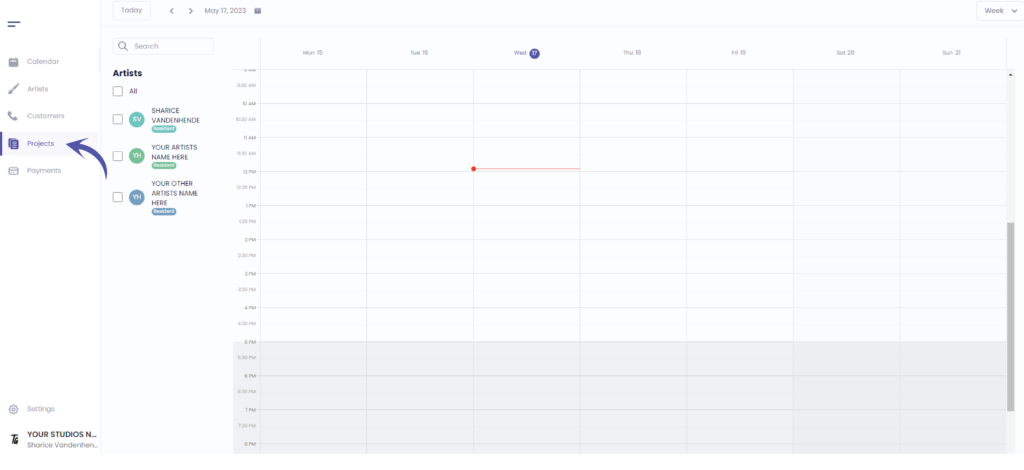
Go to ‘+ Project’
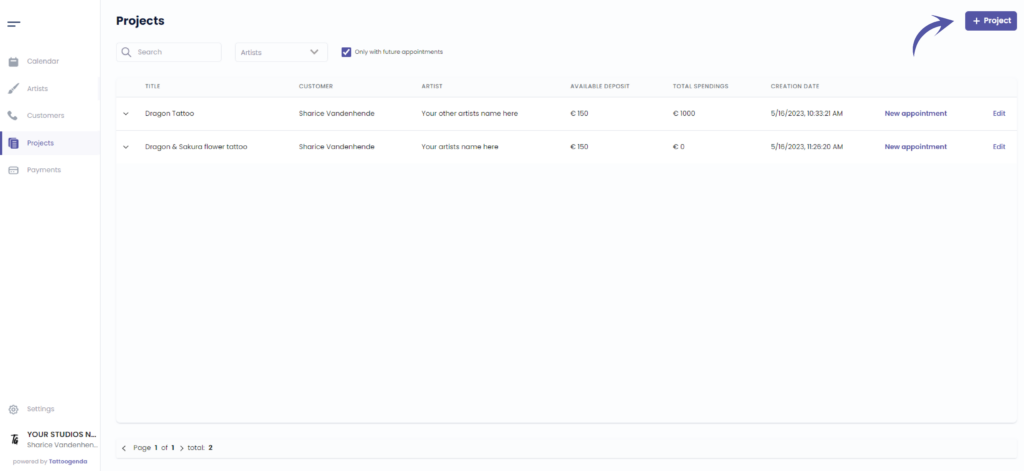
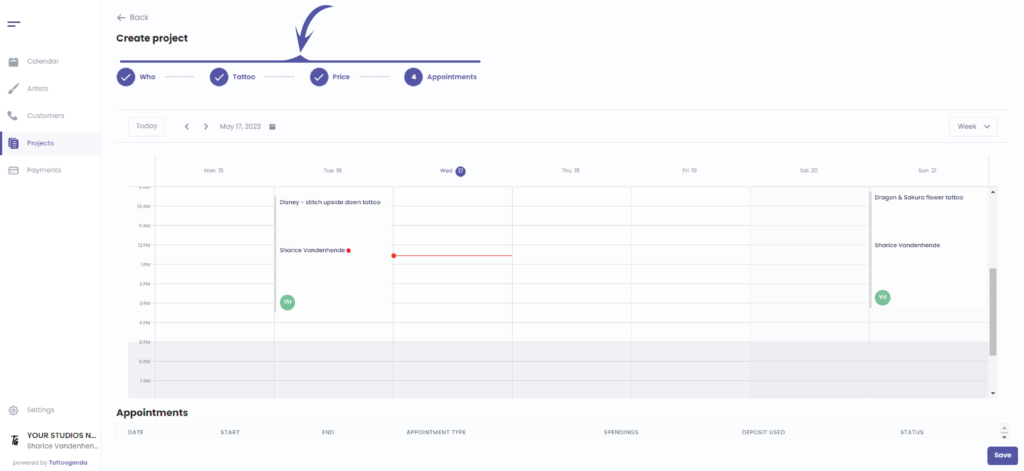
You will see the following screen
There’s a total of 4 steps
Who , Tattoo , Price , Appointments
IMPORTANT
Price tab might not be available for you if you do not have the ‘Bigger Studio’ plan or ‘Expert Studio‘.
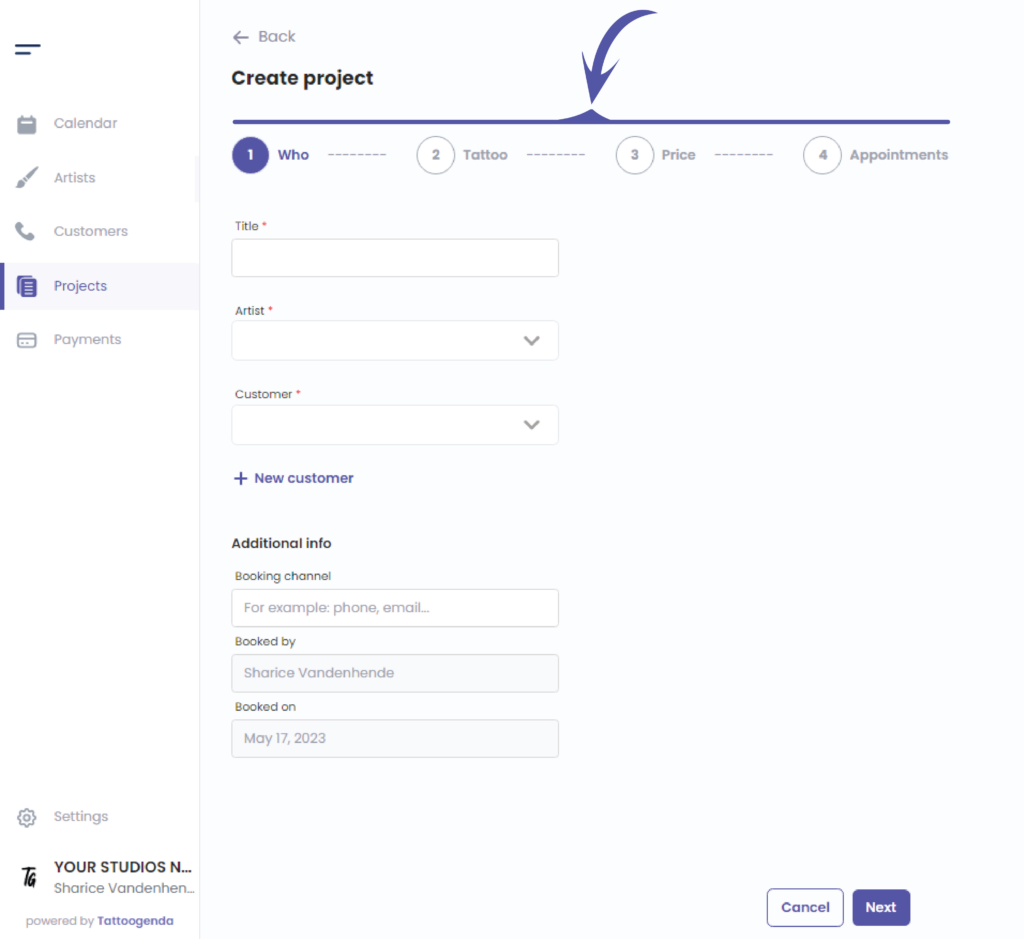
Title this is how you’d like to call this project
( e.g. Disney – stitch upside down tattoo )
Artist select the artist that will be working on this project
(e.g. We have an artist called your artist name here )
Customer here you can select your known customer, or create a new one.
( e.g. In this tutorial we had assigned Sharice as a customer )
Learn how to add a customer into the article below
Additional info here you can enter what booking channel was used.
This could be: ‘ email, phone, online, studio, convention,..
( e.g. we used studio as this project was booked into the studio )
This additional info block is only available for ‘Bigger Studio‘ and ‘Expert Studio’ subscriptions.
Click next
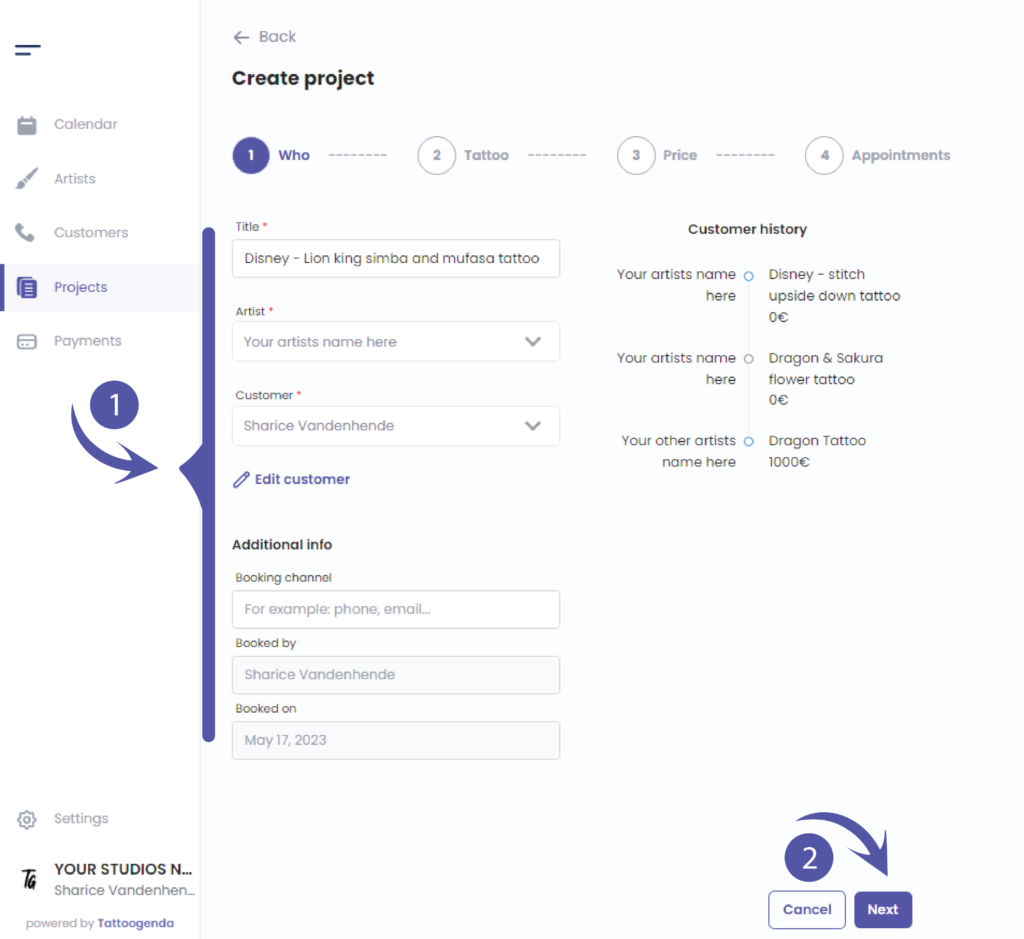
As you can see we have completed step one called ‘Who’.
We progressed to step two called ‘Tattoo’.
In this step you will enter all the information you need for this tattoo project
Tattoo description #
Place on body this field will hold the placement details
( e.g. Right lower arm )
Size this field holds the approximate size of the tattoo
( e.g. medium, or 10x5cm )
Color or black and gray this field will hold color information
( e.g. color )
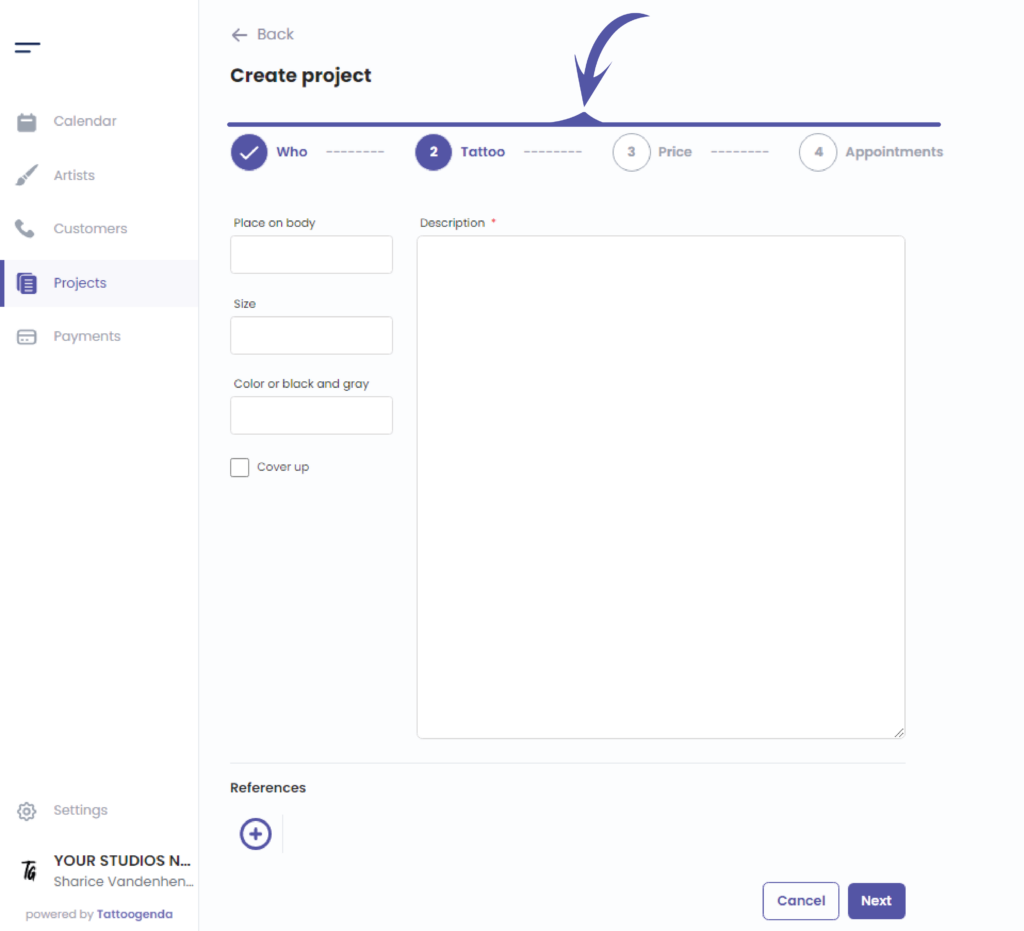
Description this field holds any information you’d like to be remembered of
This could be a description about the tattoo, the tattoo meaning, colors a client would like to see in a tattoo and more
( e.g. we entered a little bit of information about the tattoo )
If you take bookings through social media or email, you can just copy paste your conversation here.
References here you can upload any relevant example your client sent you.
( e.g. we added a picture of an upside down stitch the client liked )
We have now completed step 2 called ‘Tattoo’
Tattoo Price #
The following might not be available for you if you do not have a ‘Bigger studio’ or an ‘Expert Studio‘ plan
If you do not have this plan or higher you can skip this step.
You can see a summary of the artists financial pricing information.
This is meant as a reminder towards the person creating this booking.
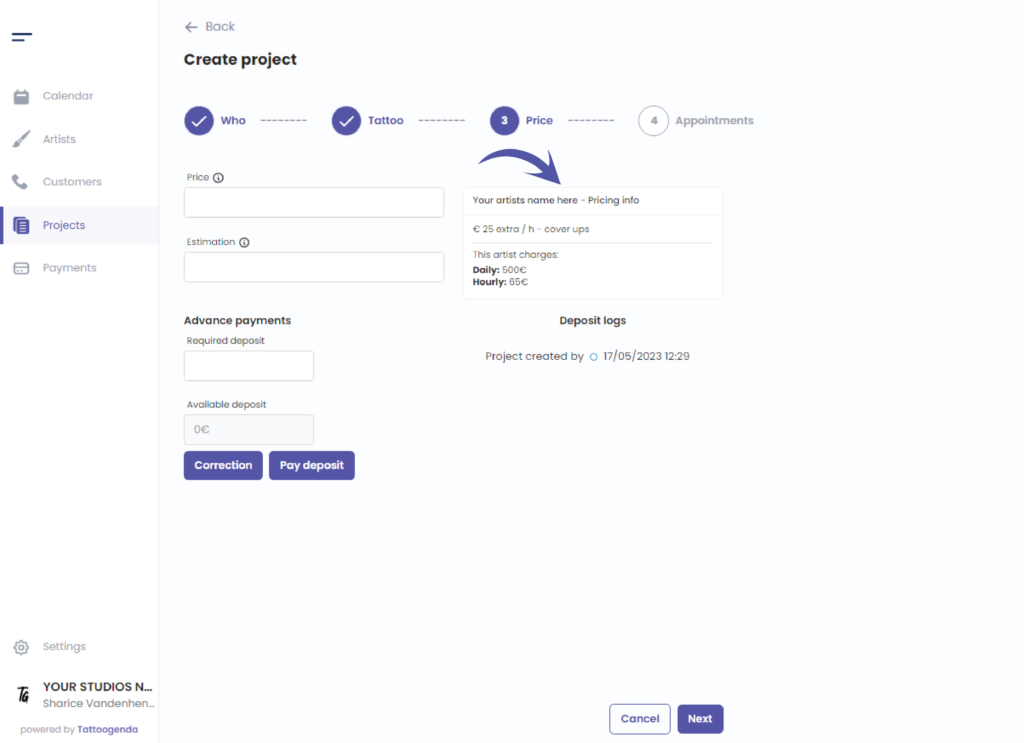
Price this can hold any information you’d like to display when a payment for this project is made.
( e.g. €65 / hour )
Estimation here you can enter your estimated time this project will take
( e.g. 2-3 hours )
Why Keep track of your estimation? #
Let’s say you estimated 5 hours to your customer. And you are finished in 7 hours instead. Then you know to maybe charge a little less than 7 hours. Or vice versa, if you worked 5 hours but you estimated 10, now you can think if you want to charge a bit less or not.
Required deposit the required deposit is the amount the customer will need to pay to confirm their appointment.
This can be prefilled for you if the artist has set their default amount.
( e.g. €150 )
Available deposit the available deposit is the amount the customer has already payed in advance and has not yet been used.
( e.g. €0 because the deposit payment has not yet occurred )
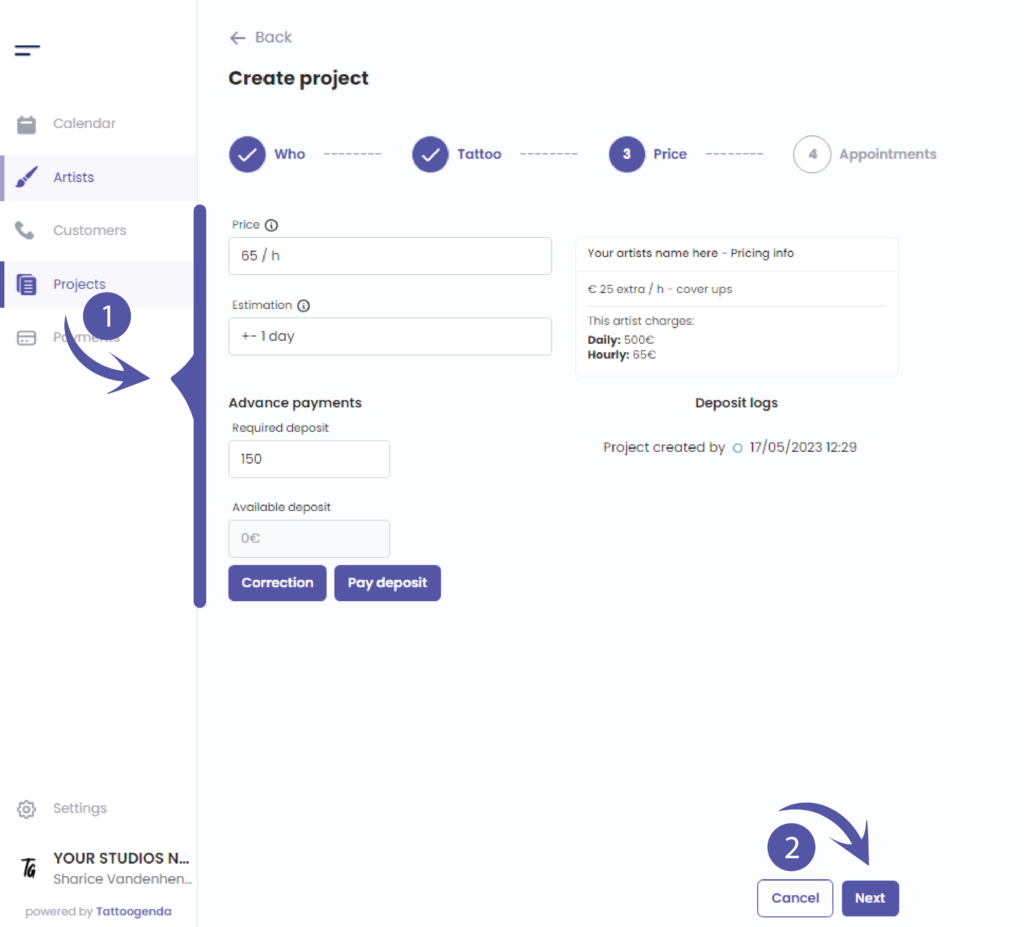
Click on the articles below for more information about how to pay a deposit or how to set a default deposit amount per artist
Your project will have created.

Optional
You can choose to book in an appointment right away in this calendar but you do not have too.
After creating an appointment click save.
You still have a problem or a question?
You can find a little link below called ‘Still stuck? How can we help!’
Written by
Sharice Vandenhende
By Tattoogenda


