

In uw Tattoogenda studio software,
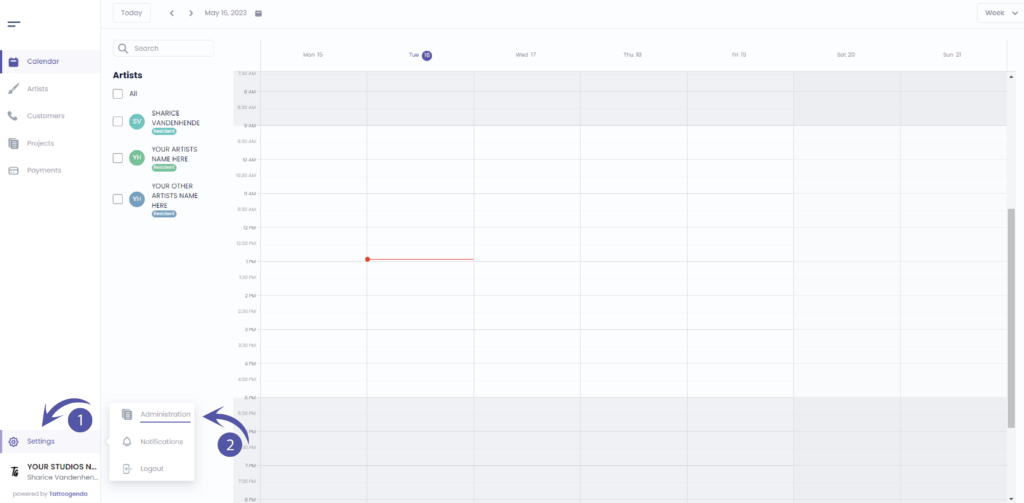
U vindt uw instellingen linksonder in uw scherm boven uw studionaam.
Ga naar je instellingen en kies ‘Administratie’
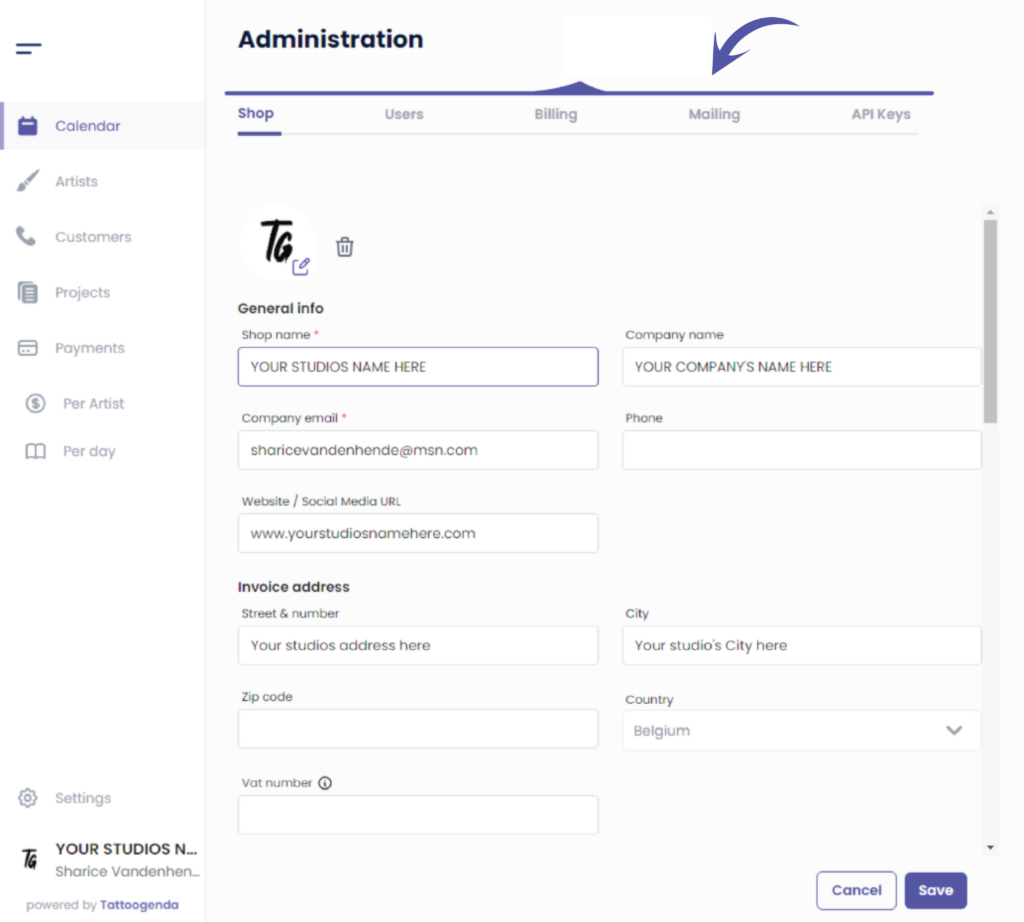
In je administratie kun je navigeren via de volgende tabbladen
Winkel, Gebruikers, Facturering, Mailing, API-sleutels
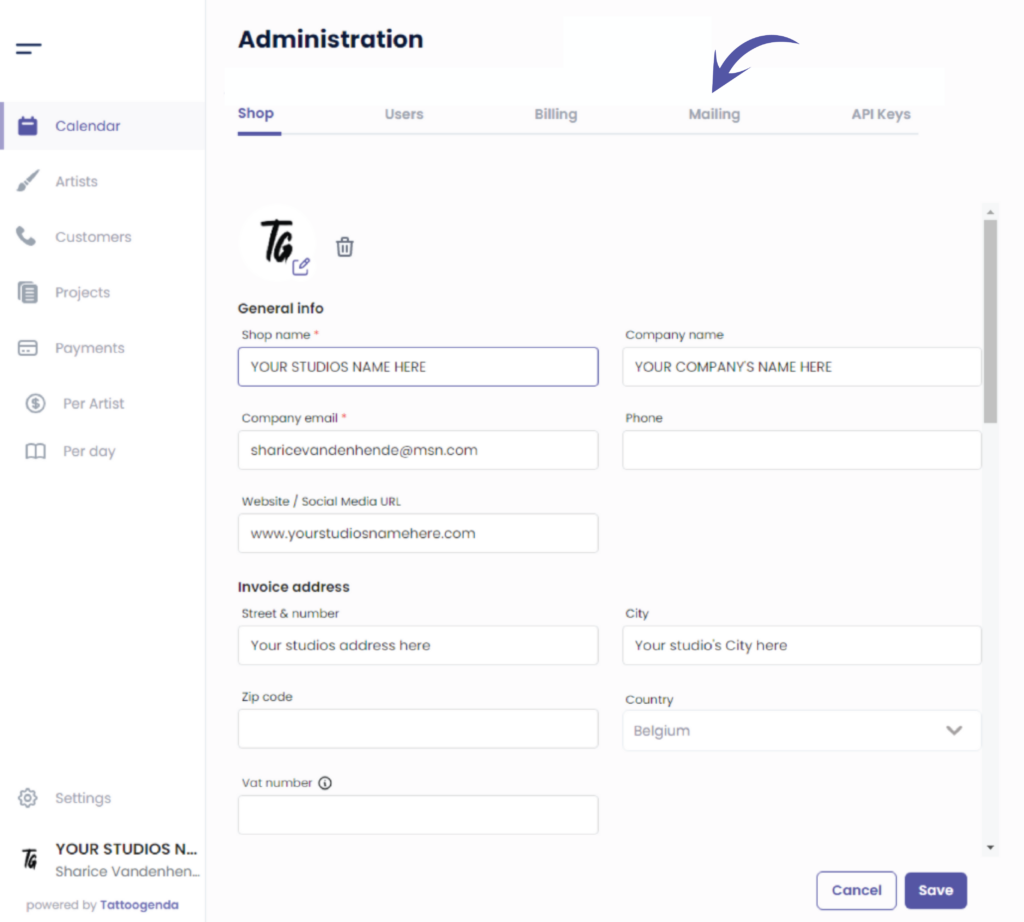
Ga naar ‘Mailing’
TG has a few automated emails that gets send to your customer.
By default, these mails will be send coming from noreply@tattoogenda.com.
Therefor, when your customer receives such mail, and hits reply, the reply won’t go anywhere and get lost.
We advice you to add your own personal email here, so those automated mails will appear to be sent from your own email address, and when replied to they will arrive in your mailbox.
TG only allows you to use sender email adresses that you have ‘confirmed’.
You can only confirm an email adress if you own the domain.
That means no ..@gmail.com or …@hotmail.com adresses, since you don’t own gmail or hotmail.
A better example is: yourname@yourshopname.com, eg. alexander@inkstories.com.
If you want to read more about why eg. gmail is not possible:
https://postmarkapp.com/blog/why-cant-i-use-gmail-address
Confirming an email address is done by setting some DNS records in your hosting providers settings. The following steps will explain more.
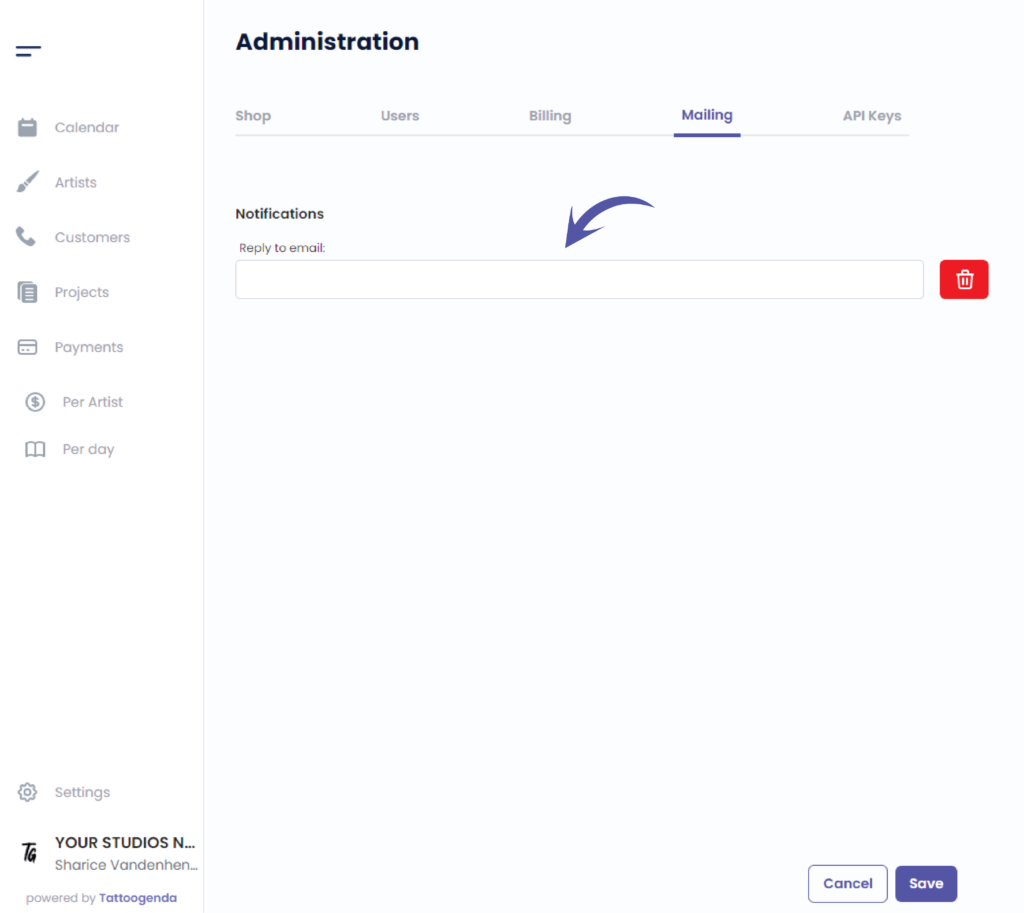
Enter your email adres and click save.
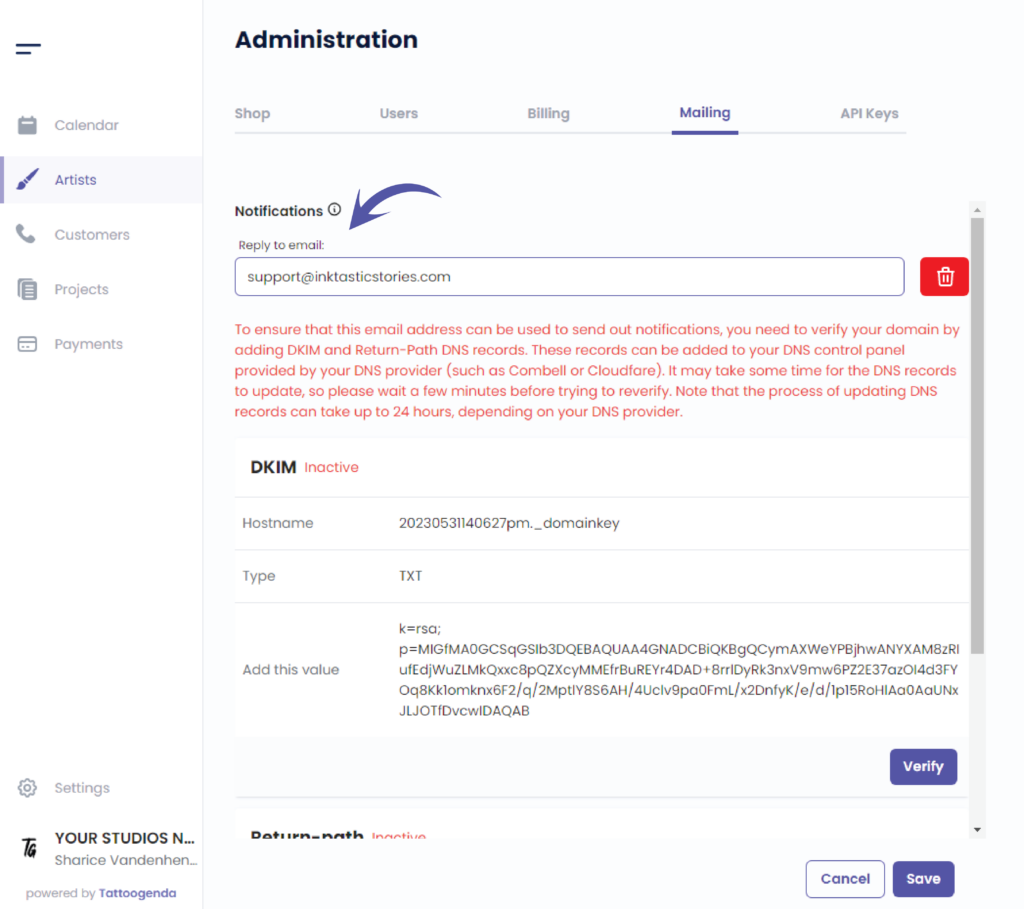
After saving you will see more information appearing.
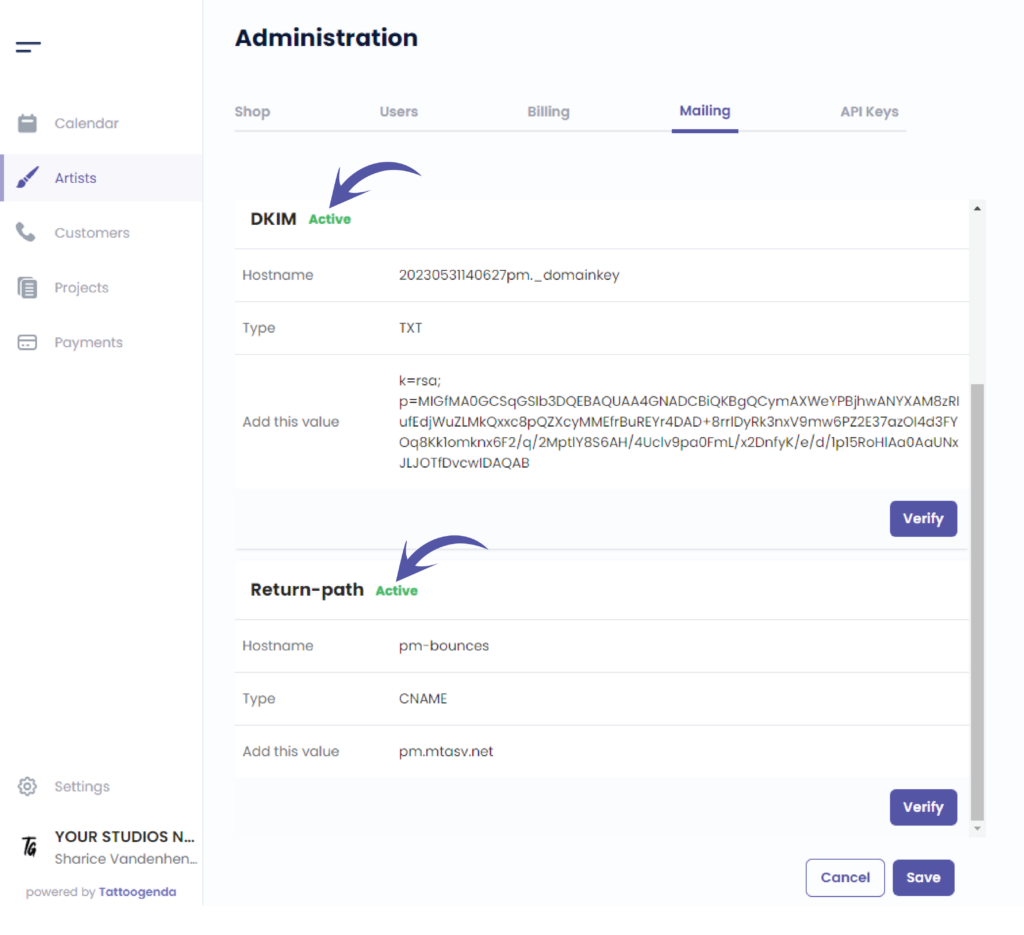
You can see right now your email is not yet active.
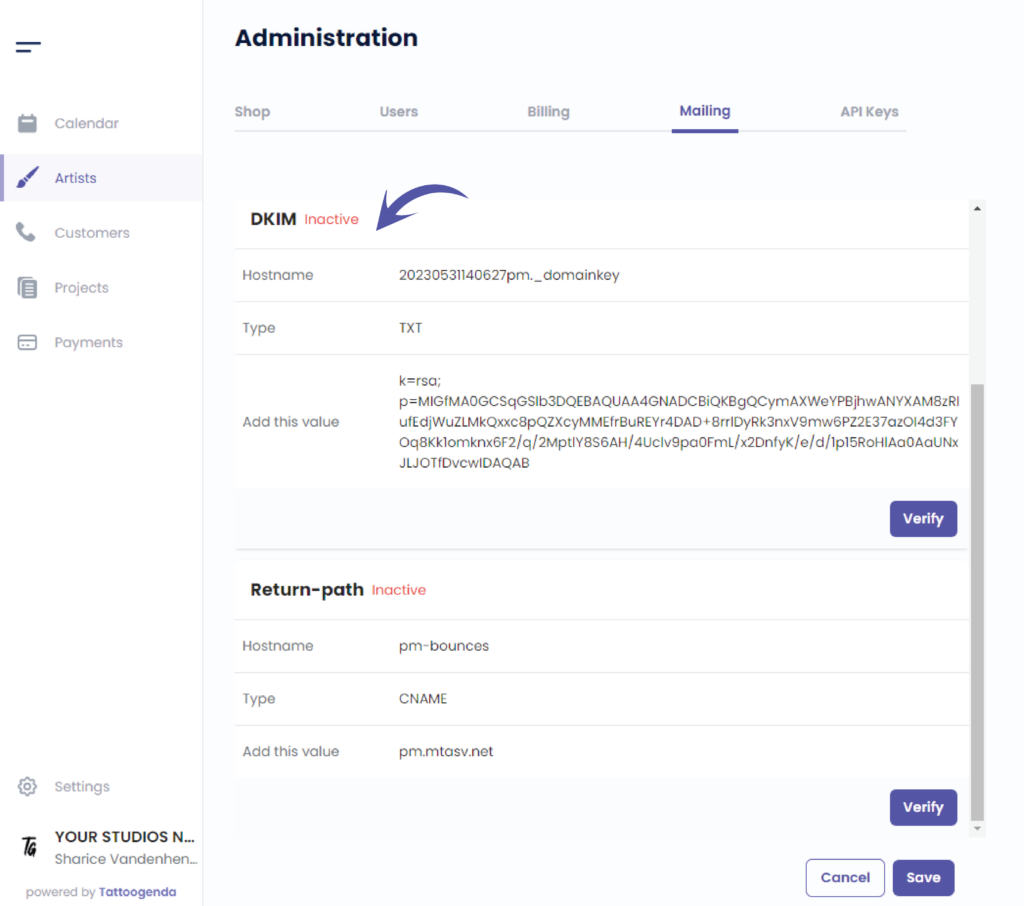
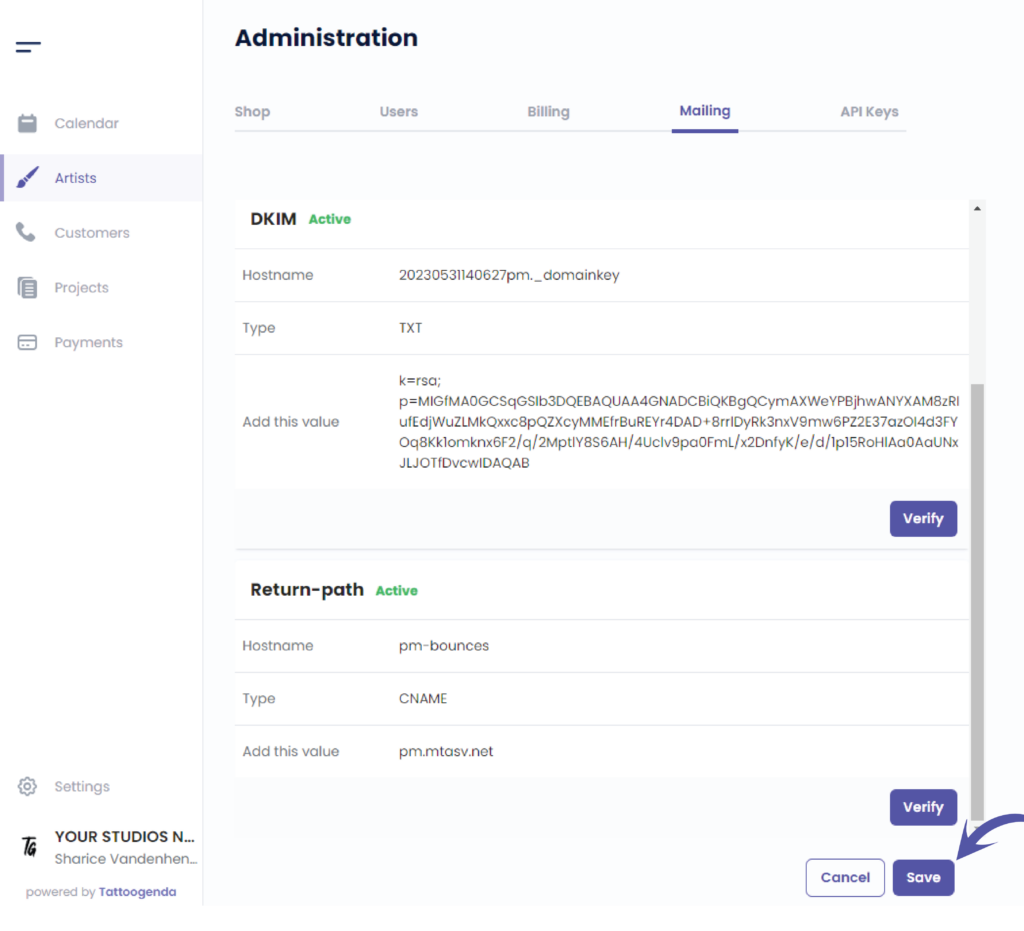
To make it active, you need to ad a DKIM TXT record in your hosting providers dashboard.
Go to your provider (where you rent your domain name and host your website), login, search for TXT and DNS settings, add a DKIM TXT record, and give it the value you can copy paste from inside TG.
Copy your TXT value from your own screen, and not the value from below screenshot.
If this is all Chinese to you, contact your website builder, or read more here:
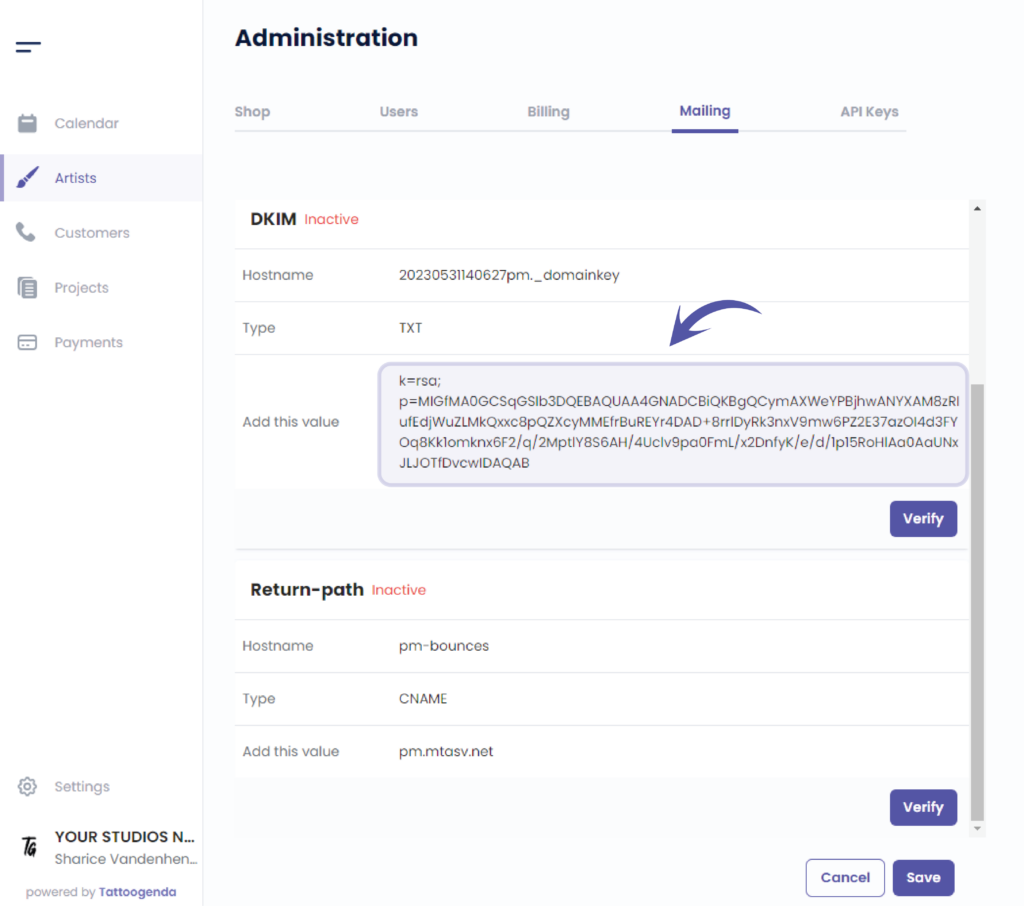
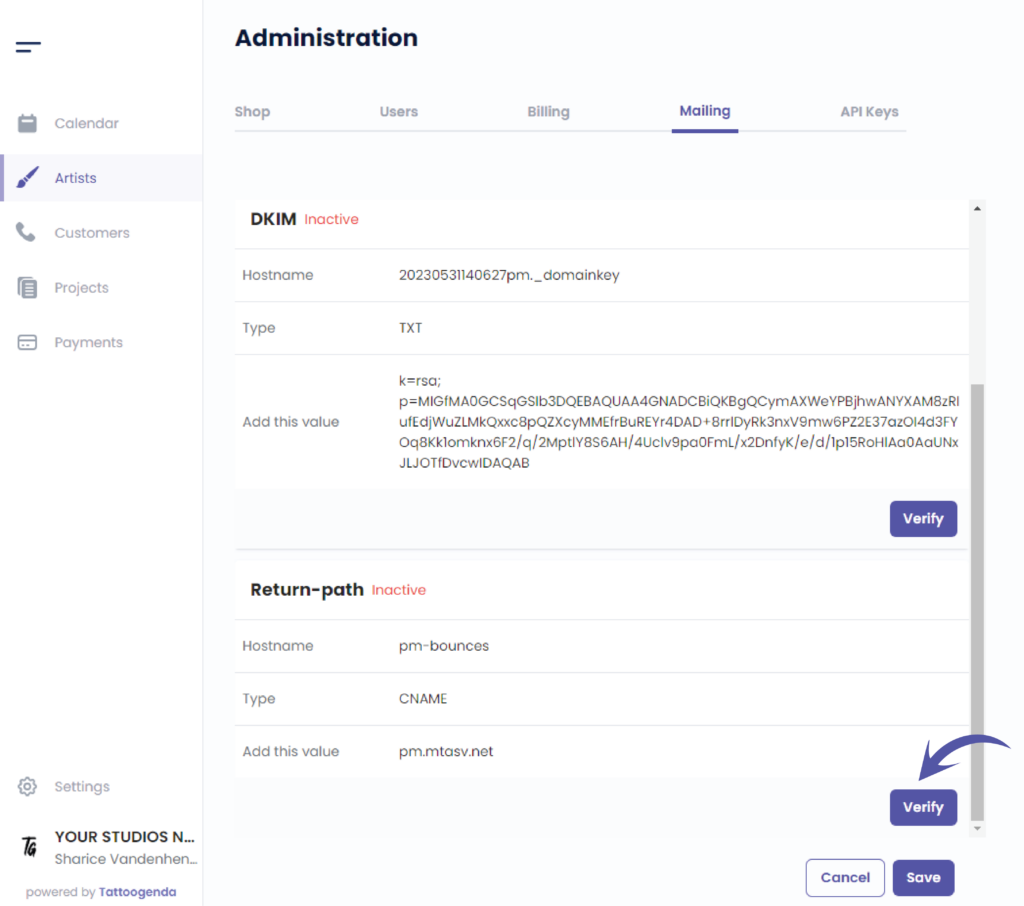
Verify after you have added the DKIM TXT RECORD into your DNS Settings
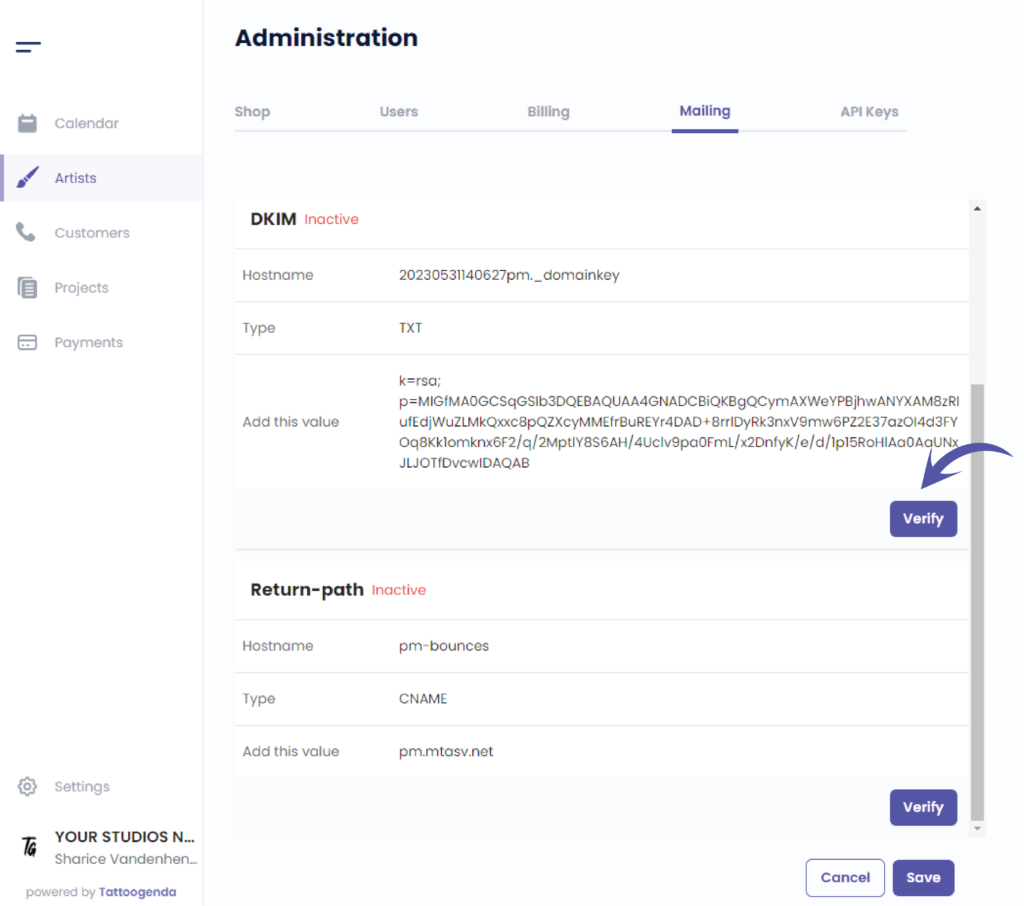
We will now add the Return-path, since this is also still inactive.
Take the same steps as before: login to your hosting providers dashboard, search for DNS and TXT settings, add a CNAME record and give it the value you find in TG.
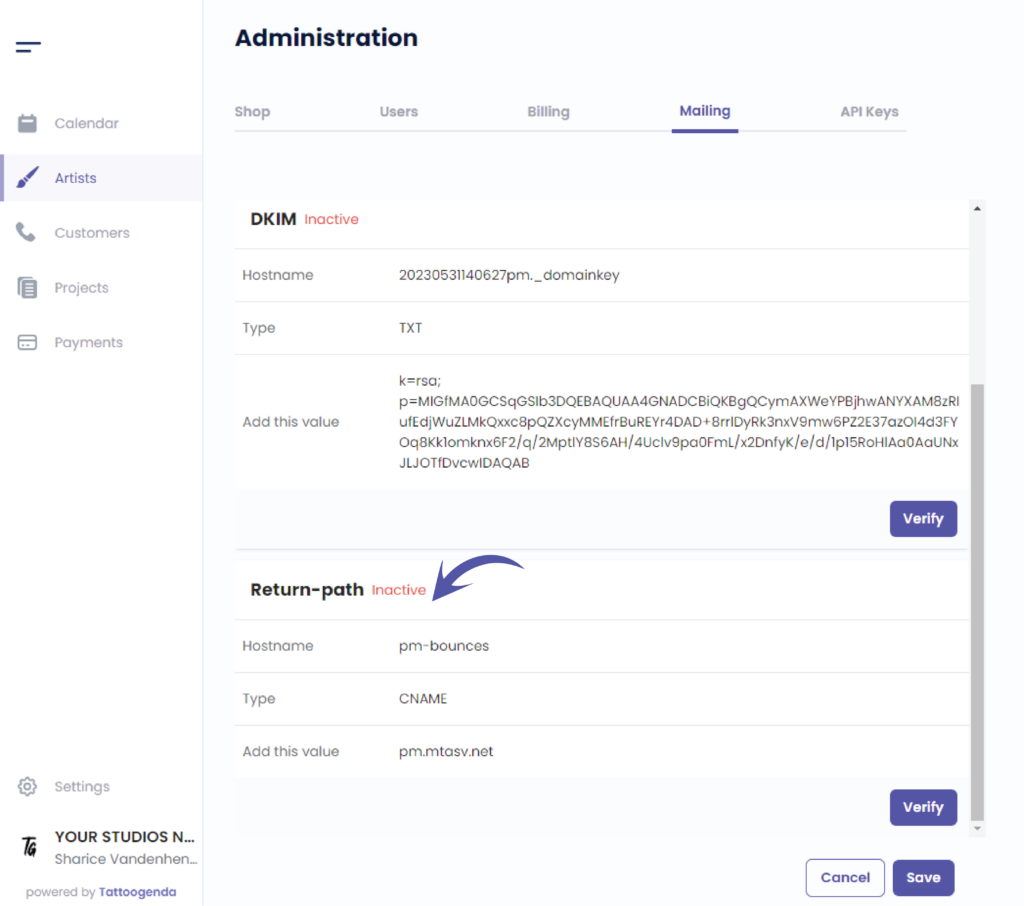
Read more about what a CNAME is in DNS-instellingen voor e-mailverzenders.
Copy your CNAME value from your own screen, and not the value from below screenshot.
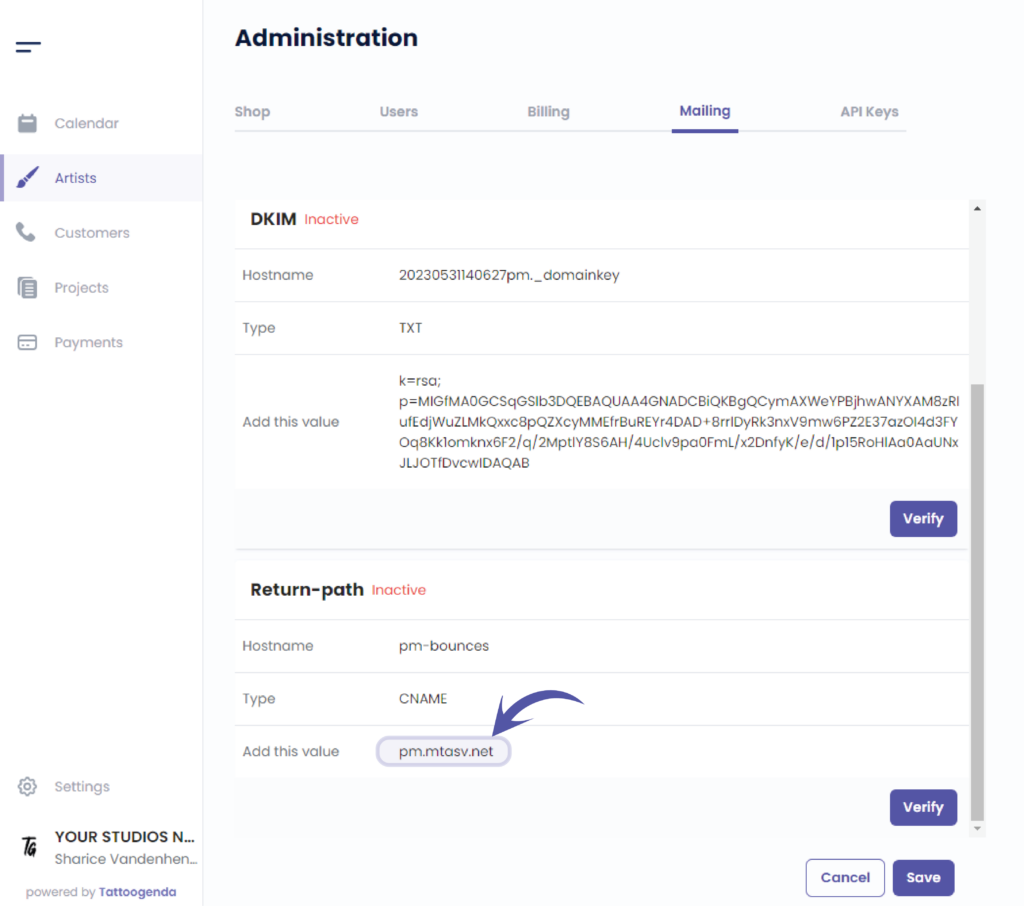
Verify after you have added this record.
They should have turned Active if this was done correctly
You can delete the current by clicking on the bin icon
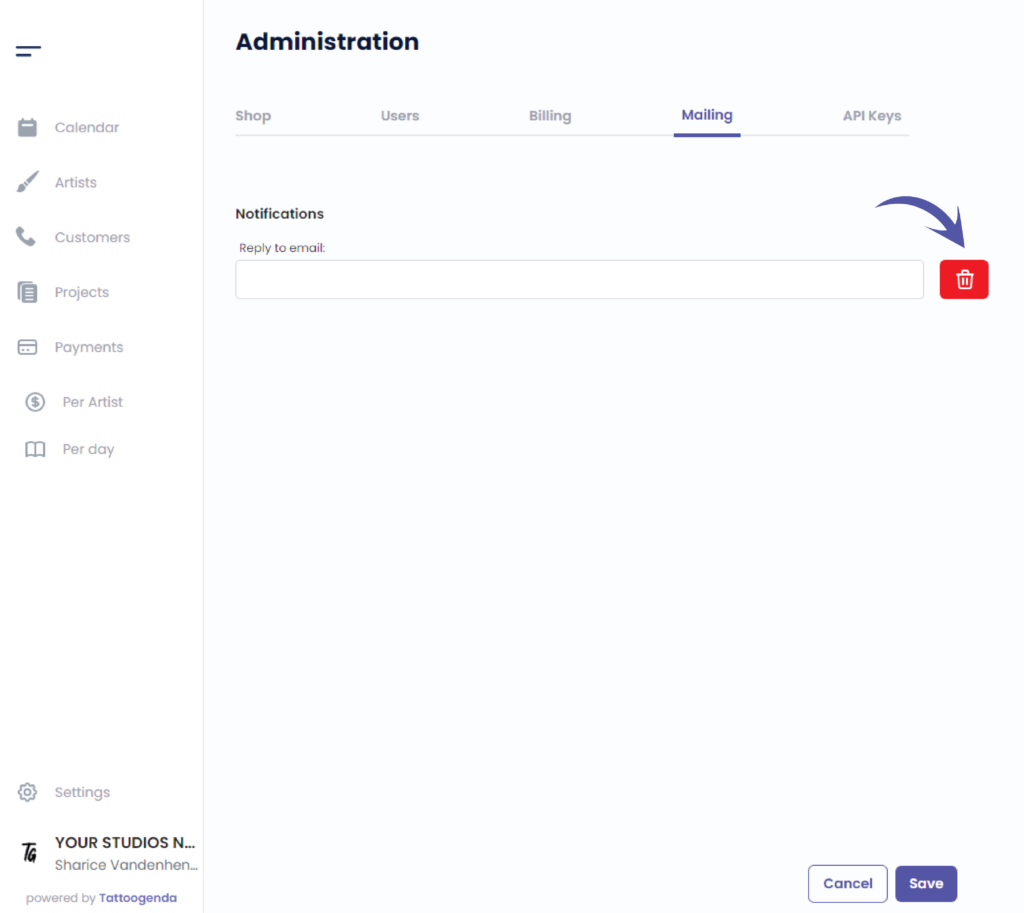
Klik op ‘Opslaan’ to save your changes
Heb je nog steeds een probleem of een vraag?
Hieronder vind je een kleine link met de naam ‘Nog steeds vast? Hoe kunnen we helpen!’
Geschreven door
Sharice Vandenhende
Door Tattoogenda


 English
  Dutch
Dutch  Dutch (Belgium)
  French
  German
  Spanish