
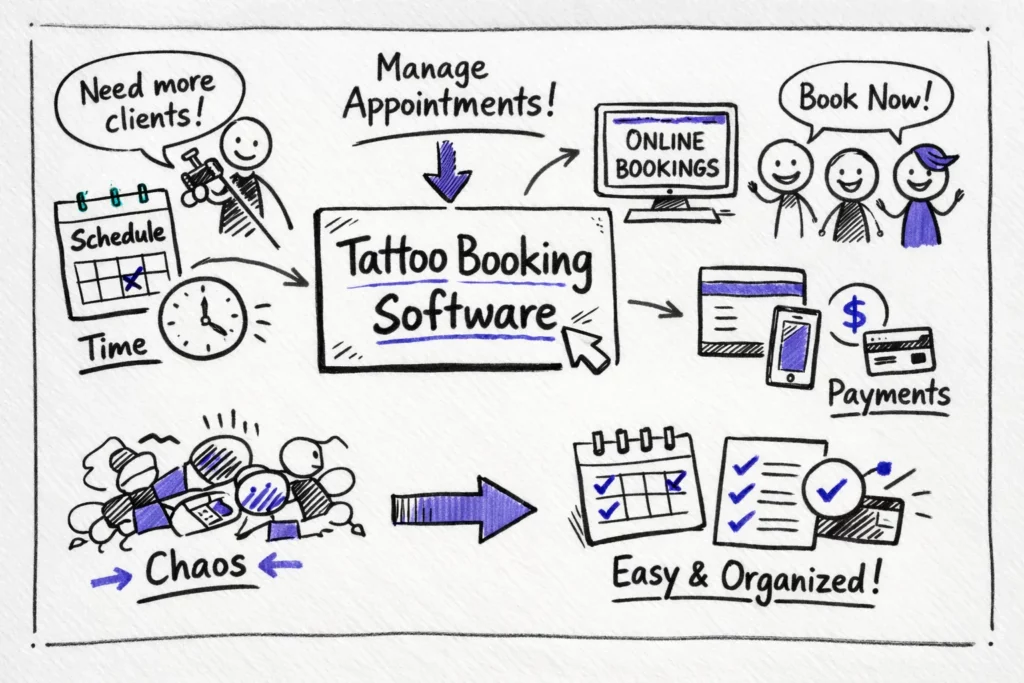
Tattoo booking software can be the difference between a full, profitable calendar and constant cancellations. Studio owners need tools built for the realities of ink: deposits at booking, automated SMS and email reminders that include reschedule links, and calendar locking to prevent double bookings. This guide explains which deposit policies, cancellation windows, and partial‑refund rules change client behavior and protect your schedule, and why scheduling apps that get these basics right matter for busy shops.
Booking software must also win clients before they click away. Mobile‑first booking pages, an Instagram booking button or widget, and fast e‑sign consent forms reduce friction and lift conversions. Saved client histories, or “ink passports,” speed repeat bookings and make aftercare notes easy to find.
Key takeaways
These quick actions protect revenue, cut no‑shows, and speed bookings. Apply the items that match your shop today.
- Collect deposits at booking (30% is a common template), set a clear cancellation window (around 72 hours), and enable calendar locking to prevent double bookings and protect revenue.
- Use automated SMS and email reminders with reschedule links and transparent partial‑refund rules to reduce missed appointments.
- Make booking mobile‑first, add an Instagram booking button or widget, and use fast e‑sign consent forms to boost conversions.
- Choose software that fits your shop—solo, multi‑artist, or piercing—looking for multi‑artist calendars, role permissions, and two‑way calendar sync.
- Compare total costs: monthly vs annual pricing, per‑user or per‑location fees, SMS credits, and transaction charges; run a short trial to test real workflows before committing.
What matters most in tattoo booking software
Start by protecting your schedule with the features that actually reduce no‑shows. Prioritize deposits at booking, automated SMS and email reminders that include a reschedule link, and calendar locking so two clients never share the same slot. Set clear cancellation windows and partial refund rules; for example, full refund if canceled seven days out, partial refund within 72 hours, and no refund inside 24 hours. Shops that require a small non‑refundable deposit alongside staged reminders often see no‑shows fall sharply; one shop switched to a $50 deposit and a 7/3/1 reminder cadence and cut last‑minute no‑shows by about 60 percent in two months.
Client‑facing tools win bookings by removing friction and building trust. A mobile‑first booking page and an Instagram booking button or widget let people book where they already spend time, while fast e‑sign consent flows that finish before the session reduce drop‑off. Keeping an ink passport with saved client history and aftercare notes makes repeat bookings simpler and improves touch‑up outcomes. Make the booking flow short, transparent about pricing and deposit rules, and show artist availability up front to convert browsers into booked sessions.
On the admin side, multi‑artist calendars, role‑based permissions, service and time‑block templates, and basic reporting keep the shop running without extra emails and calendar juggling. Two‑way calendar sync prevents ghost bookings by reflecting artist edits on personal calendars and removes manual double bookkeeping. Test any integration by adding a Google appointment and confirming it blocks the shop calendar, then create a session in your shop calendar and confirm it appears in Google Calendar. Use these features as a checklist when evaluating any tattoo booking software or tattoo booking app.
Compare top tattoo booking software options
If you shop for tattoo booking software, build a short list that matches real shop workflows. Common choices among studio owners include Tattoogenda, Setmore, Venue.ink, TattooStudioPro, and Square Appointments. Use these comparisons to match features to your shop size and priorities and choose the right booking software for tattoo artists. For a broader round‑up of options and recommendations, see our Best tattoo studio software in 2025.
Tattoogenda focuses on studio needs with 24/7 online booking, deposits at checkout, digital consent and ink passports, automated reminders, basic POS and review collection, customizable workflows, and two‑way calendar sync. It helps multi‑artist shops that need a single calendar with firm controls and fewer no‑shows; shops report steadier revenue and less time spent on admin. For a typical three‑artist setup you create artist profiles, block session lengths per artist, require deposits for larger pieces, and enable automated SMS reminders and POS checkout; centralized control reduces no‑shows and smooths operations.
Setmore is a good free option for very small teams. The free tier supports up to four users and about 200 appointments per month, while paid tiers add SMS reminders and two‑way calendar sync. Payments use Stripe, Square, or PayPal, which makes Setmore a low‑cost entry for solo artists or tiny shops but limits its use for larger rosters and advanced workflows.
Venue.ink and TattooStudioPro emphasize deposits and intake workflows. Venue.ink enforces deposit‑first bookings and supports custom forms plus Stripe, Apple Pay, and Google Pay. TattooStudioPro focuses on consent, intake, and piercing‑specific flows when detailed intake is the main requirement.
Square Appointments fits shops already in the Square ecosystem because of tight POS integration, card readers, and a streamlined checkout, but test export and migration paths first to avoid vendor lock‑in. With these summaries in mind, decide which environment (studio control, low‑cost entry, intake‑first, or POS‑integrated) best matches your shop before running a trial. If you’re weighing scheduling platforms, our detailed Timely vs. Tattoogenda comparison highlights where workflows and pricing diverge.
Best for different shop sizes: solo, multi-artist and piercing studios
Not every shop needs the same toolkit. Match software features to your daily volume and team size so you pay for what actually helps run your shop, and for solo artists, simplicity and mobile‑first design matter more than deep enterprise features.
Solo artists: keep it simple and low cost
If you work alone, prioritize a clean booking page and an Instagram widget that routes clients straight to availability. Choose a low‑cost plan that accepts payments, handles deposits, and nails the mobile UX rather than complex team controls. Keep your booking flow short and transparent so clients complete checkout on their phones.
Multi‑artist shops: centralized calendars and permissions
Multi‑artist shops need unlimited artist profiles, a shared calendar with appointment locks, shift templates, split payments, and manager‑level reporting to track utilization. Role‑based permissions help artists see only what matters to them, and reports should show chair utilization, revenue by artist, and no‑show patterns to guide scheduling. Structured onboarding and clear permissions reduce admin overhead as you add artists.
Piercing and high‑volume studios: speed and repeatability
For piercing and high‑volume studios, speed and repeatable intake are key. Build fast intake forms, quick POS flows, and short service blocks to turn seats multiple times per day. Make consent forms repeatable, automate reminders and pre‑session checklists, and choose pricing plans that handle high transaction volume without surprise fees.
Integrations that save time: payments, Instagram and POS
Integrations either speed your day or create more work. Focus on payments, calendar sync, and Instagram hooks that match your region and workflow.
Payments and POS: Stripe, Square and PCI considerations
Most platforms integrate with Stripe, Square, and PayPal so the shop never handles raw card data; processors tokenize card details and host checkout flows to reduce PCI scope. Card transactions typically cost around 2.6–2.9% plus $0.30 per sale, and those fees apply to deposits as well as final charges. Refunds can complicate funds and fees, so confirm payout timing and refund policies before you commit to a provider. For a clear primer on how payment-enabled booking systems work, review how booking systems with payments work. If you need a quick comparison of processor approaches, see a Square vs Stripe comparison.
Instagram and website widgets: setup steps and limits
Two common Instagram flows exist: a booking button that redirects to your hosted booking page, and in‑app booking via Meta partners that keeps clients inside Instagram. To set a booking button, switch to a Business account, link your Facebook page, connect your scheduling provider under Action Buttons, and test the end‑to‑end flow to ensure deposits and consent forms work. Be aware that Meta partner availability varies by region, in‑app flows may not support full payment capture or custom consent forms, and many buttons simply open a redirected booking page. If your platform supports it, consider using the provider’s Instagram integration—for example, Setmore’s Instagram booking integration—and test deposits and consent within the flow.
Calendar sync and avoiding ghost bookings
One‑way sync only pushes events in one direction, which can cause ghost bookings and double‑booking risks. Two‑way sync keeps Google Calendar and your shop calendar in real time so edits block slots across both calendars. Test any integration by adding a Google appointment and confirming it blocks the shop calendar, then create a session in your shop calendar and confirm it appears in Google Calendar.
Run payment, redirect, and calendar tests with a colleague so you see edge cases before going live. After validating integrations, evaluate deposits, automated reminders, and the no‑show workflow that protects your schedule.
Shortlist and pricing: how to compare plans, fees and trials
When comparing tattoo booking software, focus on the actual numbers, not the marketing. Build a simple cost model to compare monthly vs annual price, per‑user fees, appointment caps, SMS costs, deposit processing, and transaction fees. Model those costs against your average session price and monthly booking volume so you see real margin impact before you switch platforms.
- Monthly vs annual price (annual usually cheaper)
- Per‑user or per‑location fees
- Appointment caps or “unlimited” fine print
- Per‑SMS or credits for reminders
- Deposit processing and card transaction fees (percent + flat)
- One‑time onboarding or migration fees
Sample calculation for 30 appointments per month: assume average session $120, gross revenue $3,600. Platform and artist subscriptions total $40/month, SMS reminders $0.05 each = $1.50, and card fees at 2.9% + $0.30 average $3.78 per payment, totaling $113.40 monthly. After subtracting these line items the net is $3,445.10, roughly a 4.3% hit to revenue from subscription and payment costs alone. If you collect deposits, add deposit processing and potential refund fees to that model.
Use free trials to run a full workflow: book a client, collect a deposit, push a consent form, and schedule a multi‑artist session. Watch onboarding signals such as dedicated setup help, fast support replies, and a practical knowledge base, and run your multi‑step test inside the trial period to catch gaps before committing. Also watch for hidden costs like per‑SMS charges, fees to remove branding, premium add‑ons such as live receptionist services, and limits on calendar sync or API access. Add those extras to your first‑year estimate and confirm the platform’s refund policy for deposits and chargebacks.
Quick setup checklist to get tattoo booking software live
Before you open a booking link, map your services, artists, and availability so setup does not feel chaotic. Export or write down each service, its duration, price, which artist performs it, and regular availability windows. Decide deposit percentages and your cancellation window up front so rules match your shop policy; having this map speeds the rest of the setup and prevents last‑minute calendar changes.
- Create service entries with accurate durations and prices.
- Add artist profiles, photos and availability blocks.
- Set deposit rules per service, choose fixed or percentage, and set cancellation windows.
- Build or import digital consent forms and attach them to relevant services.
- Configure automated SMS and email reminders with easy reschedule links.
- Connect your payment processor and test a deposit payment.
- Add the booking widget to Instagram and your website and test the flow.
- Run a full test booking from client view through checkout and consent.
After setup, perform three real test bookings that confirm deposit collection, consent capture, and calendar sync, then hold a 15‑minute staff walkthrough to demonstrate the flow. Track the first two weeks for no‑shows and adjust reminder timing or deposit amounts based on what you see. Schedule a 30‑day review to tune service lengths, buffer times, and artist availability so the roster stays realistic.
Take control of your bookings
Choosing the right tattoo booking software changes how your shop runs and protects your revenue. Prioritize features that directly reduce no‑shows: secure deposits, automated SMS reminders, clear rescheduling flows, and pre‑session confirmations so your calendar reflects who will actually show up. Shortlist tools that match real shop workflows rather than chasing a feature dump, and pick a system sized for your operation so growth is painless.

