
Making quality bookings for your tattoo studio, made simple
If you’re just starting out and you’re responsible for your own bookings, there’s a possibility you might miss out on some details if you’re not used to it or simply dislike administration stuff.
On the other hand, maybe you’ve been in the game for a while and you’re now handing over the responsibility of bookings to someone else. Perhaps you’re growing your team and a manager, an apprentice or a new receptionist now has to keep up with your bookings. Chances are, they might miss out on some details too.
When someone else is in charge of your bookings and they aren’t an artist themselves – it can be tricky to keep in mind all of the important information you as an artist might need. The same can apply for an apprentice who’s now starting to tattoo for the first time! Exciting times, but also stressy.
TattooGenda is taking this off your hands. How? Summed up, our system is designed so you can’t miss.
Step 1: Creating a new customer + general info
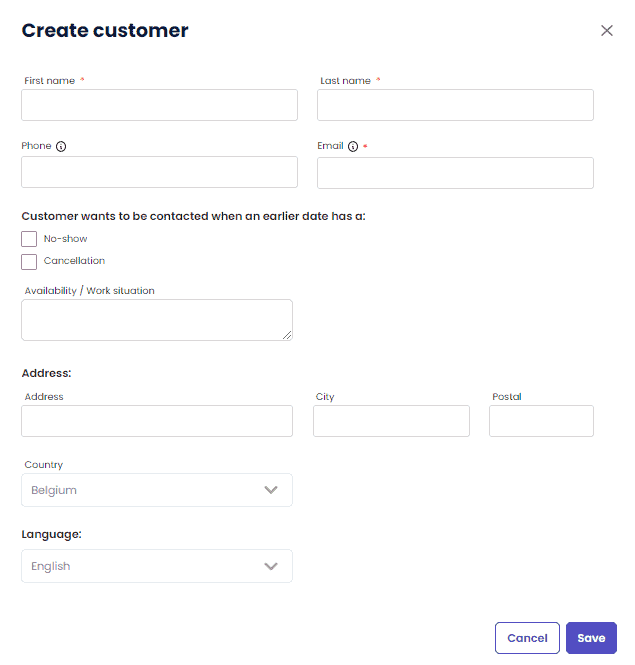
When creating a new customer, you are faced with a bunch of important fields to fill in, such as names, contact information and availability (e.g. a client can be available every Monday, which can be handy to know if a rescheduling has to happen for whatever reason).
There’s also the option to check-in a box stating if the client wants to be contacted in cases of no-shows or cancellations on earlier dates than their own appointment. This is especially handy in reducing no-shows. We’ve explained this list in depth here.
Once you’ve filled in the important and necessary information, you’re moving onto the project.
You can go through this very quickly by only entering a name, or you can fill in more fields.
Why do you want to fill in the e-mail field?
-> So the customers will receive their automated emails
Why do you want to fill in the phone number?
-> So the customer can receive their reminder SMS. + So you can call them in case you need to reshedule or ask more information.

The process of making a tattoo appointment
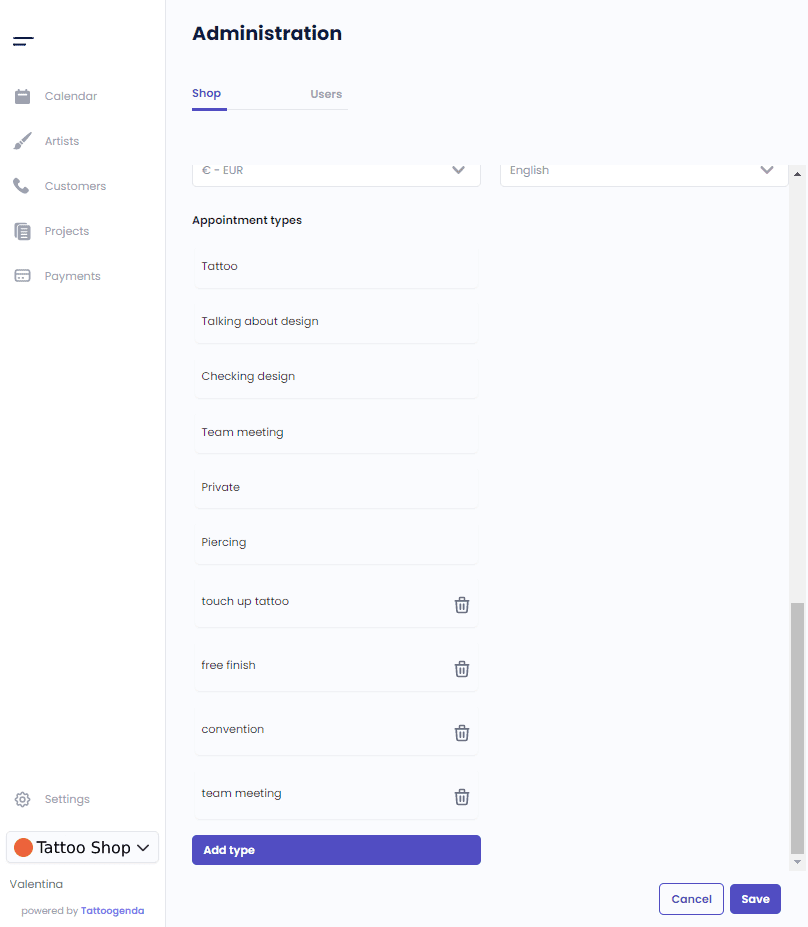
When you start creating an appointment, you’ll first be asked what appointment type it is. When ignored, the type is by default ‘Tattoo appointment’, or you can choose from the standard options we’ve already set up AND you have the possibility of adding your own from the settings, shown here.
- Tattoo appointment (=default)
- Checking a design
- Talking about a design
- Piercing appointment
- ... whatever type you've added, e.g. team meating, podcast recording, ..
Then, of course the date and hours of the appointment. Next, the customer.
You can either choose from existing customers or create a new customer.
Step 2: Creating a new project
A tattoo in TattooGenda is called a project. A project can consist of either one or multiple tattoo sessions. This is the most crucial step where lots can get messed up had the booking person not asked the right questions.
Luckily, our system is designed in a way you simply cannot mess it up. You start out by giving the project a title (e.g. Disney sleeve) and connecting it to an artist. If for some reason your receptionist or whomever else might be in charge, hasn’t thought about which artist this project would be best fitted for – now they have a reminder to stop and reflect as they cannot go further without choosing an artist.
Not matching a project with an artist is a ridiculous example, we know, but when it comes to tattoo project details, this will make a lot more sense.
Moving on, now we got to the details of the tattoo project which are so important! First, the person who’s making the booking will have to fill in the placement, size and whether it’s in color or not. Then, we have the option to fill in where the artist can find the source materials (on paper, flashdrive, ..) + if it’s a cover-up or not. Not to forget, the references (pictures) to upload + a description where the person who’s making the booking can explain in detail what the client wished for.
For expert studio’s we have some additional info such as booking channel which you are free to fill in if you wish (e.g. messenger, mail, reception, phone,…) – and booked by (booker/receptionist) and booked on (date). Those last 2 are automatically filled in by the system.
All of these are crucial for a complete tattoo appointment and a project. Without these there’s lots of open ends which an artist would otherwise have to contact the client for further clarification. Having the questions mapped out for the e.g. receptionist makes the process as simple and as complete as possible – and therefore also eliminating possible confusion.
Step 3: pricing and payment info
And to finish it off, another important part of making a quality booking – the pricing and payment information. This is a function that comes with our bigger and expert studio subscription.
This function makes it easier for you to follow your clients’ payments, deposits, payment channels, and simply everything finance related. You can read about it in depth here.
All of this together ensures there’s no way your booker will miss out on crucial details. Not only does this make your life easier, but it also trains your booker, which in most cases is a receptionist – which consequently makes the running of your shop be a smooth sail. A smooth sail also means more trusting clients.
If you have any questions, please feel free to contact us via the contact page, or you can leave a comment down below and we’ll answer you as fast as humanely possible.